

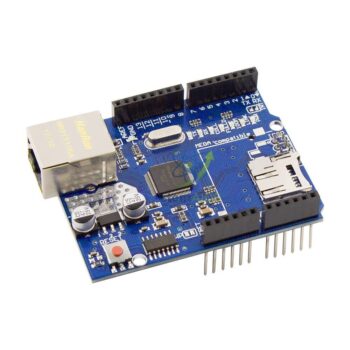

In Stock
Arduino Programming interface with Uno board
₹1,102.00
Quick Answer: The LabEquip Arduino Programming Interface with Uno Board pairs an Arduino Uno-architecture board with a straightforward USB programming setup, so students can move from installing the IDE to uploading and testing their first program with minimal setup friction — ideal for coding, embedded-systems, and STEM lab sessions.
Description
The LabEquip Arduino Programming Interface with Uno Board is built around the widely used Uno board architecture and focuses on the practical side of getting students programming quickly: connecting the board, installing drivers where needed, configuring the IDE, and uploading working code. It is suited to students, teachers, hobbyists, and laboratory users who need a dependable, well-documented platform for embedded programming and circuit-interfacing exercises.
Because it uses standard USB-based programming and broad component compatibility, it works with a wide range of input and output devices — LEDs, sensors, buzzers, motors, displays, and communication modules — making it a flexible platform for coding practice, hardware control, and project-based learning at beginner through intermediate levels.
Key Features
- Built on the widely used Arduino Uno board architecture
- Straightforward USB-based programming workflow
- Broad compatibility with common sensors, actuators, and modules
- Suitable for beginner through intermediate programming exercises
- Supports classroom demonstrations and individual lab work alike
- Backed by extensive community documentation and tutorials
Applications
- Embedded programming and coding practice in school/college labs
- Circuit interfacing and sensor integration exercises
- Robotics basics and automation practice
- Project-based STEM coursework
- Real-time project development and prototyping
Setting Up the Programming Interface
- Install the Arduino IDE (or the environment specified by your course) on your computer.
- Connect the Uno board to the computer using a standard USB cable.
- Allow the operating system to install/recognise the board’s drivers if prompted.
- Select the correct board type and communication port in the IDE.
- Open or write a starter program (sketch) for your exercise.
- Upload the program and confirm it runs correctly on the board.
- Connect additional components to the digital/analog pins to extend the exercise.
Specifications
| Board Architecture | Arduino Uno-compatible |
| Programming Interface | USB, standard Arduino IDE workflow |
| Typical Use | Embedded programming education, STEM and robotics labs |
| Skill Level | Beginner to intermediate |
| Exact Board Model, Cable & Dimensions | Not specified for this listing — confirm exact configuration with our sales team |
| Brand | LabEquip |
Compatibility & Safety Note
- Use the correct USB cable and port to avoid unreliable connections.
- Avoid disconnecting the board abruptly during an active upload.
- Keep the board and cable away from moisture and excessive heat.
- Disconnect power before rewiring external sensors or modules.
- Store the board safely between sessions to protect header pins.
- Supervise younger students during wiring and USB connection steps.
Why Choose LabEquip
LabEquip’s TLM Kits range pairs this programming interface with a wider catalogue of boards and modules, so classrooms can scale from a single programming station to a full set of project-ready hardware.
- Compare specifications with our standalone Arduino Uno Rev3 Board.
- Scale up to our Arduino Mega 2560 Board for projects needing more I/O.
- New to Arduino? Start with our complete Arduino Starter Kit.
- Add sensing capability with our Ultrasonic Rangefinder.
Frequently Asked Questions
1. What does “programming interface” mean for this product?
It refers to the USB-based connection and IDE workflow used to upload and run programs on the Uno-architecture board included with this listing.
2. Do I need special software to use it?
You need the Arduino IDE (or the environment specified by your course) installed on a computer to write and upload programs to the board.
3. Is it suitable for complete beginners?
Yes, the setup is designed to be straightforward, and there is extensive community documentation to help first-time users get started.
4. What can this be used with?
It works with a wide range of input and output devices, including LEDs, sensors, buzzers, motors, displays, and communication modules.
5. Is it suitable for school and college labs?
Yes, it is designed for classroom demonstrations, individual lab exercises, robotics basics, and project-based STEM learning.
6. Are exact hardware specifications listed here?
Detailed board, cable, and dimensional specifications are not specified for this listing — please confirm exact configuration with our sales team before ordering.
Last Updated: September 2026
You must be logged in to post a review.
Bestsellers






Reviews
There are no reviews yet.