
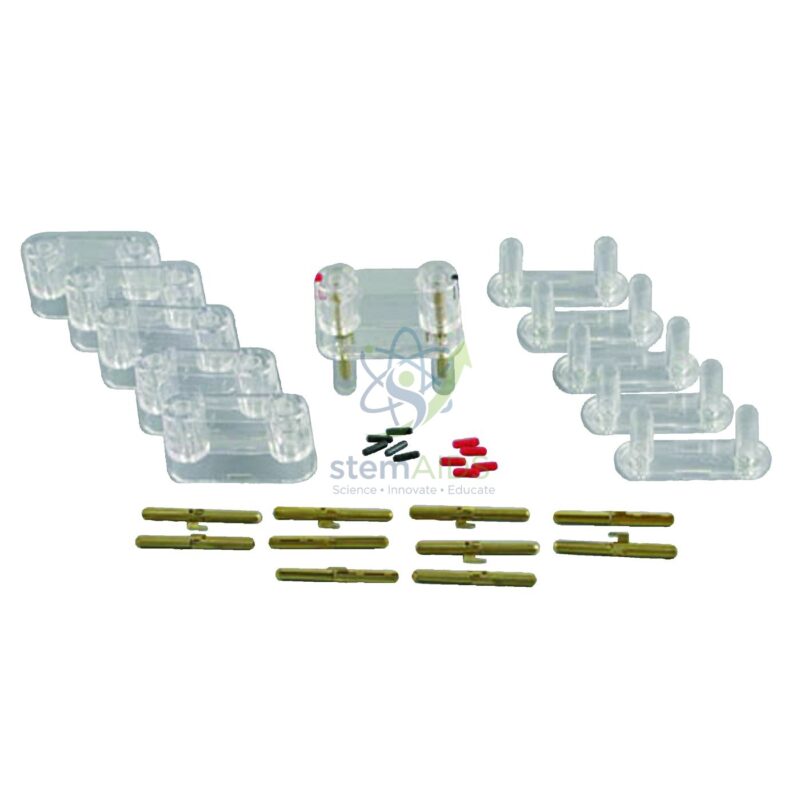
Quick Answer: Self-assembly UME enclosures are clear plastic housings with metal plug pins, shown in the photograph as a set of housings with loose pins and small coloured parts, for building your own plug-in component modules. A part of your choice is fitted inside and connected to the pins, giving a permanent module that sits on the UME board alongside the standard ones.
Building a Module of Your Own
Start by choosing the component and checking that it fits inside one of the self-assembly UME enclosures with room for its leads. Trim the leads, bend them so they reach the pins without strain, and solder each one to its pin. Where the part is polarised, such as an LED, diode or electrolytic capacitor, decide which pin is positive and keep the same convention on every module you make.
Before closing the housing, test the work with a multimeter: continuity from pin to component, the expected resistance or diode behaviour, and no short between the pins. A module that passes these checks is closed, labelled with its circuit symbol and value, and used like any factory-made module.
Why Departments Make Their Own Modules
A standard module set covers the usual parts, but courses and projects often need more: a different resistor value, a particular sensor, a buzzer, or a part from a design task. Self-assembly enclosures let a department extend its set at the pace its syllabus requires while keeping every part in the same plug-in format.
Building a module is a practical skill in itself. Students solder, read component markings, check polarity and test their work with a meter, then see their module working in a class circuit.
Specifications
| Product | Self-assembly enclosures for UME component modules |
| Shown in photograph | Several clear housings, metal plug pins and small coloured parts |
| Assembly | Component leads soldered to the pins inside the housing |
| Result | Plug-in module for the UME connection board |
| Enclosures per set | Confirm at enquiry |
Projects and Uses
- Making modules for resistor values or sensors missing from the standard set
- Running a soldering and testing project with older students
- Rebuilding a damaged module in a new housing
- Packaging a buzzer, reed switch or other part needed in a design task
Care & Handling
- Use a temperature-controlled soldering iron and keep the clear housing away from the hot tip
- Check polarity and label every module before it goes into use
- Test each finished module with a multimeter
- Store unused housings and pins together so parts are not lost
Why Choose LabEquip
Physics and electronics departments buy self-assembly enclosures when their module set needs parts it was never supplied with. LabEquip can provide them with the UME universal component holder for parts that change often; contact LabEquip about set sizes, or see our physics lab equipment.
Frequently Asked Questions
Do I need to solder to build a module?
Yes, the component leads are soldered to the plug pins inside the housing. A small temperature-controlled iron and thin electronics solder give the neatest joints.
Which components are suitable?
Two-lead parts small enough to fit the housing: resistors, diodes, LEDs, small capacitors, thermistors, LDRs and similar.
How should polarity be marked?
Choose one pin as positive for all your modules and mark it the same way every time, then add the circuit symbol and value on the housing. Consistency prevents reversed parts in class circuits.
How do I test a finished module?
Use a multimeter to check continuity from each pin to the component, the expected resistance or forward and reverse diode behaviour, and that the two pins are not shorted together.
Is building modules a suitable student project?
For students old enough to solder safely under supervision, yes. It combines soldering, reading component markings, polarity and testing, and the finished module is used in real circuits.
How many enclosures come in a set?
The photograph shows several housings with loose pins. The number in a set can be confirmed at enquiry, so mention how many modules you plan to build.
Last Updated: October 2026



Reviews
There are no reviews yet.