
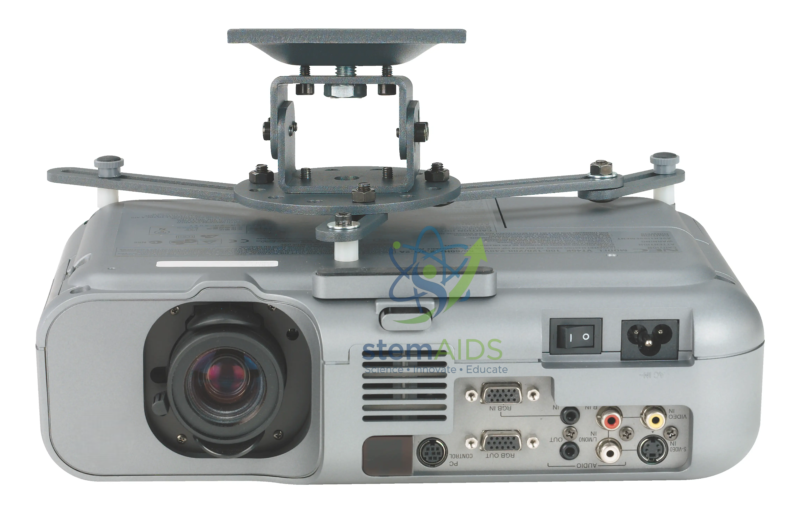
Quick Answer: The Universal Ceiling Mount for Projector is a ceiling bracket whose adjustable arms screw into the fixing holes under a projector, hanging it from a drop pole above the room. Universal means this projector ceiling mount adjusts to suit many projector models rather than one.
How a Universal Projector Mount Works
Projectors have threaded holes in their base, but the positions differ between brands and models. A universal mount has a central plate with sliding or rotating arms, so each arm can be lined up with one fixing hole and secured with a screw of the correct thread. The listing photo shows this spider-style bracket attached to a projector, with a pole rising to a ceiling plate.
The pole sets the drop from the ceiling, which matters in rooms with high ceilings or ceiling fans. Joints at the bracket usually allow the projector to be tilted and turned so the image lands square on the screen; keystone correction in the projector menu is then needed only for small remaining errors, which matters because heavy keystone correction softens the picture.
The load the mount can carry, the length range of the pole and the screw sizes supplied should be checked against the projector’s weight and fixing threads before installation.
Installation and Safety
- Installation should be done by a competent installer, fixing into concrete, a joist or another structural support, never into a false-ceiling tile alone.
- Fit a separate safety cable between the projector and the ceiling structure as a back-up to the bracket.
- Leave space around the projector’s vents and run power and video cables along the pole with ties.
- Check the screws and joints once or twice a year, and after any projector change, since vibration can loosen them.
Applications
- Fixing a standard-throw projector such as the Epson EB-X49 above the middle of a classroom
- Lecture halls and labs where a projector on a desk would be knocked or blocked
- Rooms where the projector must line up with a fixed projection screen
- Replacing an old projector while keeping the existing ceiling point, by resetting the arms
Specifications
| Type | Universal ceiling mount with adjustable arms |
| Fits | Projectors with threaded fixing holes in the base |
| Height | Drop pole between ceiling plate and bracket |
| Adjustment | Arm spacing, plus tilt and swivel at the bracket |
| Load rating and pole length | Confirm at enquiry |
Why Choose LabEquip
Mounts are ordered with projectors for new rooms, and on their own when schools move projectors off desks and trolleys. LabEquip lists this mount in General Lab Products; give the projector model through the contact page so the fit can be checked.
Frequently Asked Questions
Will a universal ceiling mount fit my projector?
It fits most projectors that have threaded fixing holes in the base, provided the hole spread falls within the arms’ adjustment and the weight is within the mount’s rating. Ultra-short-throw projectors usually need their own wall arm instead.
How do I find the right screws for the projector?
The thread size is given in the projector’s manual, usually in the ceiling mounting section. Use that size and a length that engages the thread without bottoming out, since forcing a long screw can crack the projector’s base.
Do I need a safety cable?
It is good practice. A steel safety cable looped through the projector’s security point and anchored to the ceiling holds the projector if a screw or joint fails.
How do I set the projector upside down?
A ceiling-mounted projector hangs inverted, so set the projection mode in its menu to front ceiling. The image then appears the right way up without using keystone correction.
Can a universal mount be fixed to a false ceiling?
Not to the tiles alone. The fixing plate must reach the structural slab or a support frame above, often with a longer pole passing through the tile. Have an installer assess the ceiling first.
Why is the projected image a trapezium instead of a rectangle?
The projector is not square to the screen. Adjust the tilt and swivel of the mount first so the lens faces the centre of the screen, then use keystone correction only for the small error that remains.
Last Updated: September 2026




Reviews
There are no reviews yet.