


In Stock
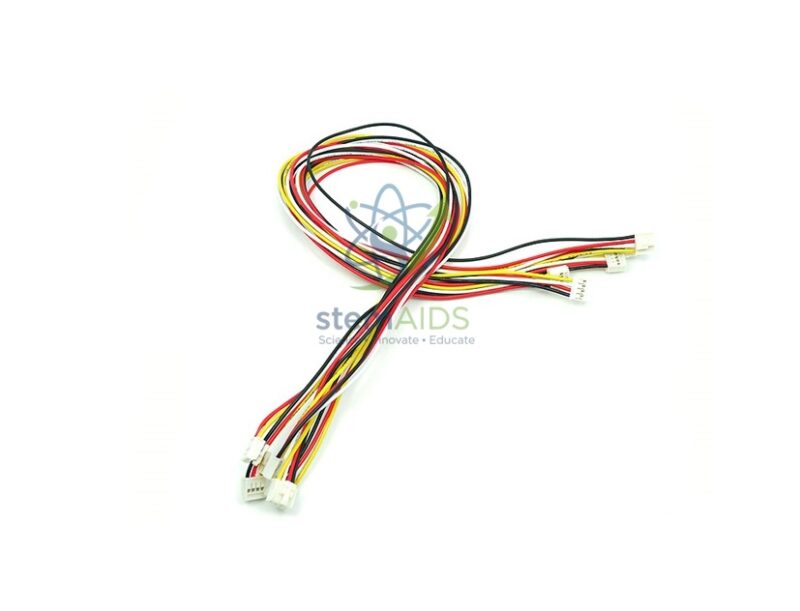
Set of 5 cables 30 cm with Grove Locking
₹240.00
Quick Answer: The Set of 5 cables 30 cm with Grove Locking is a pack of five four-wire Grove cables, each 30 cm long, with latching connectors that click into Grove sockets and resist being pulled out. These Grove locking cables join sensors and output modules to a shield or controller when a module has to sit some distance away.
What the Four Wires Carry
Every Grove connection uses the same four-wire layout: power, ground and two signal lines. By Grove convention the power wire is red and ground is black, while yellow and white carry the signals. What those signal lines do depends on the port they are plugged into: two digital pins, an analogue input, an I2C clock and data pair, or serial transmit and receive. Because the cable is identical for all of them, one set serves every Grove module in a kit.
The locking connector has a small latch that clicks into the Grove socket. Plain Grove plugs can work loose when a robot vibrates, a model is carried or a student tugs a cable, and a single loose signal wire produces baffling faults. Latched plugs stay put until the tab is pressed, which saves a great deal of debugging time in class.
At 30 cm each cable is long enough to place a sensor at the far side of a model, bring a distance sensor to the front of a robot or run a light sensor to a window while the controller stays on the desk. Five cables in a set suits a typical project with several modules.
Specifications
| Contents | 5 Grove cables (as named in the listing) |
| Length | 30 cm each |
| Connectors | Grove locking (latching) connectors |
| Wires | Four: power, ground and two signal lines |
| Use with | Any Grove module, shield or Grove-ready controller |
Applications
- Connecting sensors such as the Grove Ultrasonic Ranger at the front of a robot chassis
- Running light or moisture sensors to a window box or plant pot away from the controller
- Building models of houses, greenhouses and road junctions where modules are spread out
- Replacing worn or lost cables in existing Grove class kits
Care & Handling
- Unplug by pressing the latch and pulling on the connector housing, never by pulling the wires.
- Keep the 30 cm Grove cables loosely coiled; tight bends at the plug break the wires over time.
- Route cables away from wheels, fans and motors in moving projects.
- Retire any cable that has been crushed or nicked, as damaged wires can short or swap signals.
Why Choose LabEquip
Cables go missing or get damaged faster than modules, so schools running Grove kits usually keep a stock of spares. LabEquip lists this set of five in its Stem Kits range with the sensors and outputs it connects; order the number of sets you need through the contact page.
Frequently Asked Questions
What is the difference between locking and standard Grove cables?
Locking cables have a latch that clicks into the socket and must be pressed to release. Standard plugs rely on friction alone, so they can loosen with vibration or when a model is moved.
Do these cables fit every Grove module?
Grove modules and ports share the same four-pin socket, so the cables connect any Grove module to any Grove port. The port type, digital, analogue, I2C or serial, is set by where you plug in, not by the cable.
Why are 30 cm cables useful?
They let modules sit away from the controller, for example a sensor at the front of a robot or near a window. Shorter cables keep tidy layouts on a desk, while 30 cm gives room for larger models.
What do the wire colours mean?
By Grove convention red is power, black is ground, and yellow and white carry the two signal lines. Knowing this helps students trace faults and understand what each port does.
Can two cables be joined to make a longer one?
Grove plugs are designed to connect cable to socket rather than cable to cable. For a longer run, use a longer Grove cable made for the purpose, remembering that very long leads can affect some signals such as I2C.
How do I release a locking plug without damaging it?
Press the latch tab on the connector fully, then pull the housing straight out. Wiggling it or pulling by the wires can bend the pins or break the crimps inside the plug.
Last Updated: September 2026
You must be logged in to post a review.
Bestsellers

Sale

Sale
Sale


Reviews
There are no reviews yet.