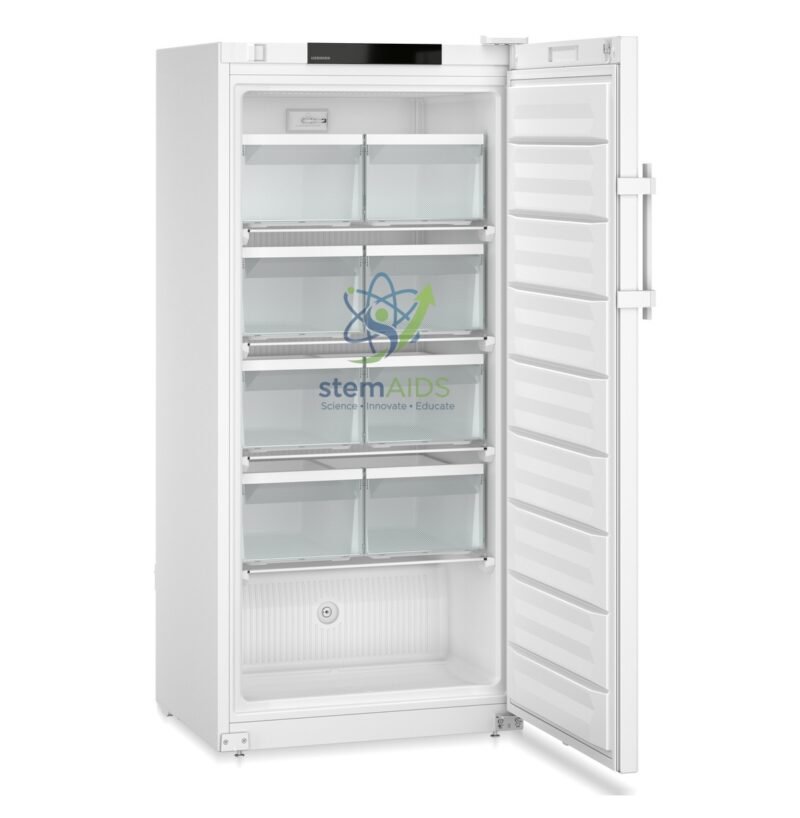
Atex Drawer Freezers

The StemAids ATEX Drawer Freezers SFFfg Series Version 740 are spark-free laboratory freezers designed for safe frozen storage of temperature-sensitive substances in closed containers. These upright drawer freezers are suitable for laboratories handling flammable substances, chemical samples, reagents, reference materials, pharmaceutical products, and research samples requiring controlled storage between -9°C and -30°C.

Product Description

The StemAids ATEX Drawer Freezers SFFfg Series Version 740 are based on professional laboratory freezer designs with spark-free interiors and ATEX-compliant construction. They are intended for controlled storage in laboratories where ignition-source reduction inside the storage chamber is important.

The Version 740 range is available in drawer-based configurations such as SFFfg 4001 Var 740 and SFFfg 5501 Var 740. The drawer arrangement helps users organise samples, bottles, packs, boxes, and closed containers efficiently while reducing exposure time during access. These freezers are suitable for chemical laboratories, pharmaceutical labs, industrial QC labs, research institutions, universities, medical laboratories, and controlled storage rooms.

Product Specifications

Parameter SFFfg 4001 Version 740 SFFfg 5501 Version 740
Product Type ATEX / spark-free upright laboratory freezer with drawers ATEX / spark-free upright laboratory freezer with drawers
Brand StemAids StemAids
Reference Type Liebherr SFFfg 4001 Var 740 type Liebherr SFFfg 5501 Var 740 type
Temperature Range -9°C to -30°C -9°C to -30°C
Gross / Net Capacity Approx. 316 L / 190 L with drawers Approx. 499 L / 394 L with drawers
Drawer Configuration 6 drawers 8 drawers
External Dimensions Approx. 597 × 654 × 1884 mm, W × D × H Approx. 747 × 769 × 1684 mm, W × D × H
Internal Dimensions Approx. 403 × 402 × 1588 mm, W × D × H Approx. 588 × 517 × 1388 mm, W × D × H
Cooling System Static cooling Static cooling
Defrosting Manual defrost Manual defrost
Energy Consumption Approx. 384 kWh/year or 1.052 kWh/24 h Approx. 516 kWh/year or 1.414 kWh/24 h
Noise Level Approx. 49 dB(A) Approx. 49 dB(A)
Refrigerant R290, depending on supplied model R290, depending on supplied model
Mains Connection 220–240 V, 50 Hz 220–240 V, 50 Hz
Approx. Weight Approx. 82 kg for drawer version Approx. 106 kg for drawer version
Interior Safety Spark-free / ignition-source-free interior for suitable closed containers Spark-free / ignition-source-free interior for suitable closed containers
Door Steel door, lockable, reversible depending on configuration Steel door, lockable, reversible depending on configuration
Application Flammable sample storage, reagent storage, laboratory frozen storage, QC storage High-capacity flammable sample storage, reagent storage, laboratory frozen storage, QC storage

Key Features

  • ATEX-compliant spark-free interior for suitable closed-container storage
  • Adjustable freezing range from -9°C to -30°C
  • Drawer-based storage for organised sample and reagent handling
  • Available in 190 L and 394 L net drawer configurations
  • Static cooling system for laboratory freezer applications
  • Manual defrost system for controlled maintenance
  • Lockable upright cabinet for controlled access
  • Suitable for laboratories handling flammable substances in closed containers
  • Useful for chemical, pharmaceutical, industrial QC, research, and educational laboratories

How to Use

  1. Place the freezer on a clean, dry, level, and well-ventilated laboratory floor.
  2. Check that the installation area is suitable for laboratory freezer operation and has correct mains supply.
  3. Allow the freezer to stand upright after transport before connecting power.
  4. Connect the freezer to a properly grounded 220–240 V, 50 Hz power supply or as specified on the rating plate.
  5. Set the required storage temperature between -9°C and -30°C according to the stored material requirement.
  6. Allow the freezer to reach the selected temperature before loading materials.
  7. Store only compatible substances in sealed and suitable closed containers.
  8. Arrange materials in drawers with clear labelling, batch identification, and storage records.
  9. Do not overload drawers or block internal cooling airflow.
  10. Minimise door opening time to maintain stable storage temperature.
  11. Monitor temperature regularly and document readings as required by laboratory SOP.
  12. Defrost manually when frost build-up affects drawer movement or cooling efficiency.
  13. Clean the interior using a laboratory-approved method after switching off and safely removing contents.

Applications

  • Storage of flammable substances in closed containers
  • Pharmaceutical sample and reagent storage
  • Chemical laboratory frozen storage
  • Industrial quality-control sample storage
  • Research laboratory frozen material storage
  • University and institutional laboratory storage
  • Temperature-sensitive chemical reference material storage
  • Closed-container solvent-related sample storage where ATEX-rated storage is required
  • Laboratory inventory management with drawer-based segregation

Safety and Handling Guidelines

  • Store only materials compatible with the freezer rating, temperature range, and laboratory SOP.
  • Use closed, sealed, and chemically compatible containers for stored substances.
  • Do not store open volatile liquids, leaking containers, unstable chemicals, or explosive materials unless explicitly permitted by safety documentation.
  • Confirm whether the freezer classification matches the hazardous-zone and material-risk requirement before procurement.
  • Do not modify electrical parts, thermostat, wiring, drawers, or internal fittings.
  • Maintain adequate ventilation around the freezer to prevent overheating.
  • Keep the door closed and locked when not in use.
  • Use insulated gloves when handling frozen containers.
  • Follow institutional chemical storage rules, SDS instructions, and ATEX safety protocols.
  • Disconnect power before deep cleaning, servicing, or shifting the freezer.

Quality and E-E-A-T Notes

The StemAids ATEX Drawer Freezers SFFfg Series Version 740 support evidence-based laboratory storage by combining spark-free interior safety, defined temperature control, lockable access, drawer-based organisation, and controlled sample segregation. For regulated environments, users should maintain temperature records, inspect door seals, verify alarm and monitoring arrangements, follow SDS storage requirements, and document freezer qualification where required.

FAQ

1. What is the StemAids ATEX Drawer Freezer SFFfg Series Version 740 used for?

It is used for frozen laboratory storage of compatible flammable substances, reagents, chemicals, and samples in sealed closed containers.

2. What does ATEX mean in this freezer?

ATEX refers to equipment designed according to European explosion-protection requirements. In this freezer category, the interior is designed to reduce ignition-source risk for suitable closed-container storage.

3. What is the temperature range?

The adjustable temperature range is -9°C to -30°C.

4. Which drawer versions are available?

Common Version 740 drawer configurations include SFFfg 4001 Var 740 with 6 drawers and SFFfg 5501 Var 740 with 8 drawers.

5. What capacity options are available?

The SFFfg 4001 Version 740 drawer model offers approximately 190 L net drawer capacity, while the SFFfg 5501 Version 740 drawer model offers approximately 394 L net drawer capacity.

6. Is the freezer suitable for open solvent containers?

No, open solvent containers should not be stored. Materials should be stored only in suitable sealed closed containers and according to SDS and laboratory safety rules.

7. Is this a frost-free freezer?

No, these drawer freezer models use manual defrost.

8. Can it be used in pharmaceutical laboratories?

Yes, it is suitable for pharmaceutical and quality-control laboratories where the temperature range and ATEX/spark-free storage requirements match the application.

9. Does it require temperature monitoring?

Temperature monitoring is recommended for laboratory, QC, pharmaceutical, and regulated sample storage. Monitoring requirements depend on internal SOP and compliance needs.

10. What power supply is required?

Public specifications list 220–240 V, 50 Hz mains connection for these reference models. Always confirm the rating plate before installation.

11. What is the difference between SFFfg 4001 Var 740 and SFFfg 5501 Var 740?

The SFFfg 4001 Var 740 is a narrower 6-drawer model with approximately 190 L net drawer capacity, while the SFFfg 5501 Var 740 is a wider 8-drawer model with approximately 394 L net drawer capacity.

12. How should the freezer be maintained?

Keep the cabinet clean, maintain ventilation clearance, inspect door seals, defrost when needed, clean drawers safely, verify temperature performance, and service only through qualified personnel.

Why Choose StemAids?

StemAids laboratory cold-storage solutions are selected for practical workflows, controlled sample protection, and institutional laboratory requirements. The StemAids ATEX Drawer Freezers SFFfg Series Version 740 support spark-free frozen storage, organised drawer access, controlled -30°C class storage, closed-container chemical safety, and reliable workflow management for research, pharmaceutical, chemical, industrial QC, university, and institutional laboratories.

SEO Keywords

StemAids ATEX Drawer Freezer SFFfg Series Version 740, ATEX Laboratory Freezer with Drawers, SFFfg 4001 Var 740, SFFfg 5501 Var 740, Spark Free Laboratory Freezer, Explosion Proof Laboratory Freezer, Laboratory Freezer for Flammable Substances, -30°C ATEX Freezer, Chemical Storage Freezer, Pharmaceutical Laboratory Freezer, Drawer Freezer for Laboratory

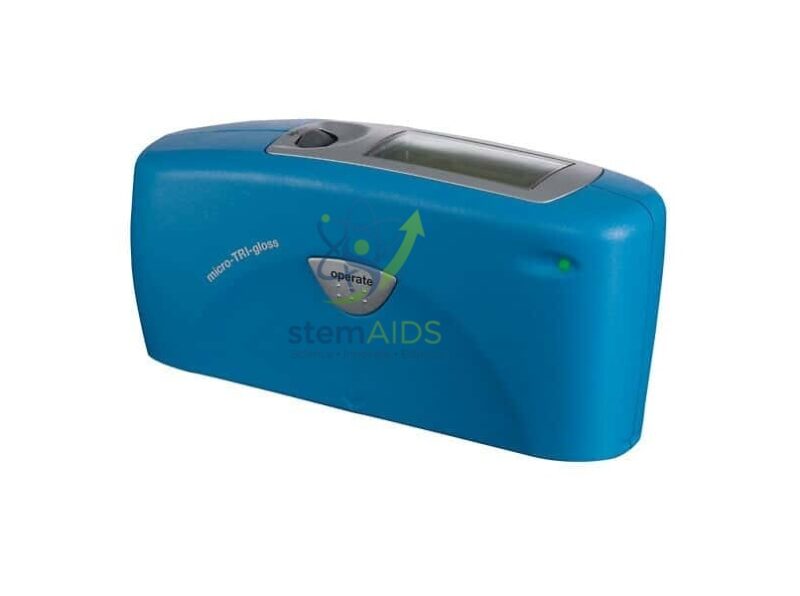
Micro-TRI-gloss Brillancemeter

Quick Answer: The Micro-TRI-gloss gloss meter, listed as ‘Micro-TRI-gloss Brillancemeter’, is a handheld instrument that shines light onto a surface at a fixed angle and measures how much is reflected in the mirror direction. The listing photo shows a compact blue unit with a display window and an ‘operate’ button, used to compare the shine of paints, coatings and plastics.

How a Gloss Meter Puts a Number on Shine

‘Brillancemeter’ comes from the French ‘brillancemètre’, meaning gloss meter. Gloss is how mirror-like a surface looks, and the eye judges it inconsistently under different lighting. A gloss meter removes the guesswork: a light source inside the unit sends a beam onto the surface at a set angle, a detector positioned at the mirror angle measures the reflected light, and the result is expressed in gloss units (GU) relative to a calibrated reference.

Gloss measurement uses standard geometries: 60° as the general-purpose angle, 20° to separate high-gloss finishes, and 85° for matt surfaces, where reflection at the other angles is too weak to tell samples apart. The ‘TRI’ in this model’s name points to a three-angle meter, so one instrument can cover matt, satin and high-gloss samples; the angles and range should be confirmed for the unit supplied.

In teaching and research labs a gloss meter makes surface finish measurable. Students can follow how the gloss of a paint film changes as it dries, compare coatings applied at different thicknesses, or record how abrasion and weathering dull a plastic surface. The photo shows a blue housing with the display window on top, an ‘operate’ button on the front and a small indicator lamp.

Specifications

Item Handheld gloss meter
Listed as Micro-TRI-gloss Brillancemeter
Measures Specular reflection, reported in gloss units (GU)
Form Compact blue housing with display window and ‘operate’ button (photo)
Measuring angles and range Confirm at enquiry

Applications

  • Following the gloss of paint films as they dry or cure
  • Quantifying scratch and abrasion damage on plastic or lacquered test panels
  • Materials projects on surface finish, such as polishing metal coupons to increasing smoothness
  • Checking that sample panels in a coatings practical start with a consistent finish

Care & Handling

  • Calibrate the Micro-TRI-gloss against its reference tile at the start of each measuring session, following its instructions.
  • Keep the measuring aperture and the reference tile clean; a fingerprint on either changes the readings.
  • Place the meter flat on the sample and lift it off rather than sliding it, so the aperture is not scratched.
  • Store it in its case away from dust, and remove the batteries if it will not be used for a long period.

Why Choose LabEquip

University and college labs teaching paints, polymers and surface coatings, along with quality-control training courses, are the typical buyers of a gloss meter like this. It is listed among LabEquip’s chemistry lab equipment; ask about angles and accessories through the contact page.

Frequently Asked Questions

What is a gloss unit?

It is the scale gloss meters report on. A polished black glass reference is defined as 100 GU at the chosen angle, and other surfaces are measured relative to it, so a matt wall paint reads low and a polished lacquer reads high.

Which measuring angle should I use?

Start at 60 degrees. If the reading is above about 70 GU, a 20 degree measurement separates high-gloss samples better; if it is below about 10 GU, 85 degrees gives more useful results on matt surfaces.

Why is it called a brillancemeter?

The name comes from the French brillancemètre, which means gloss meter. It is the same type of instrument that English-speaking labs call a glossmeter.

Can it measure curved or textured surfaces?

Gloss meters give their most reliable results on flat, smooth samples larger than the measuring aperture. Curved or heavily textured surfaces scatter light unevenly, so treat readings on them as comparative only.

How often does the meter need calibrating?

Check it against its reference tile at the start of every session, and again if the room temperature changes or after a long series of readings. A dirty or scratched tile gives a false calibration.

Does gloss relate to surface roughness?

Yes. A smoother surface reflects more light in the mirror direction and gives a higher gloss reading, while a rough one scatters light in many directions. That is why polishing raises gloss and abrasion lowers it.

Last Updated: September 2026

Technibec 2.0 Electric Beak Pack + Table for Microbiology

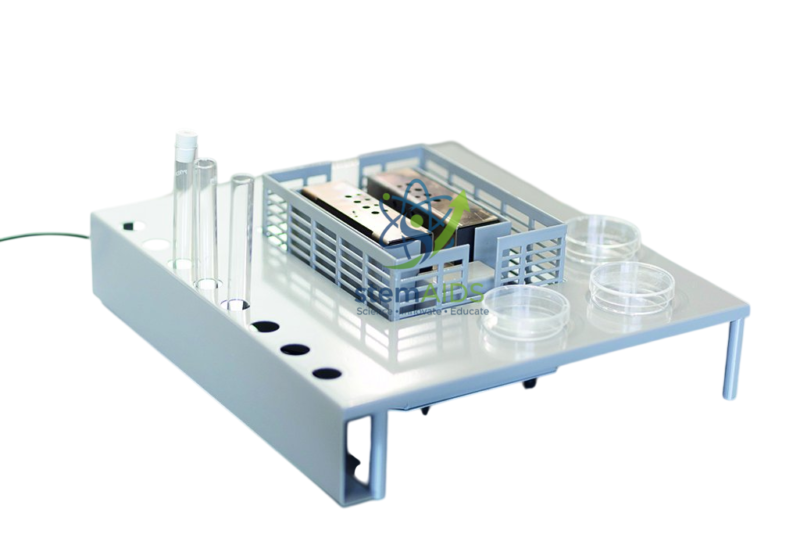
Quick Answer: The Technibec 2.0 microbiology pack combines the Technibec 2.0 electric burner with the microbiology table made for it, listed as ‘Technibec 2.0 Electric Beak Pack + Table for Microbiology’. The listing photo shows the burner inside a raised table with a row of tube holes along the front and room for Petri dishes beside the heat.

Burner and Table as One Aseptic Station

Buying the burner and table as a pack means the two parts arrive matched. The Technibec 2.0 electric burner supplies flameless heat, and the table stands around it to turn the bench in front of the student into an organised aseptic area. ‘Beak’ in the title is the French ‘bec’, meaning burner.

In this pack photo the table is pale grey and raised on legs, with a slatted enclosure in the centre where the burner sits. Along the front edge is a row of holes, shown holding glass tubes upright, and on the right a flat area where Petri dishes can be set down within reach of the warm zone. A cable leads away at the back. The same table is also listed on its own as the microbiology table for Technibec, for schools that already have the burner.

Working at this station, a student can take a loop to the heat, open a culture tube standing in the table, transfer to a plate and close the lid without putting anything down on the open bench. The table has no heating of its own, and the area around the burner enclosure becomes hot during use.

Applications

  • Streak-plate practicals in which every student works at an identical station without an open flame
  • Broth-to-broth subculturing with both tubes held upright in the table
  • Inoculating plates on the flat area beside the heat
  • Microbiology rooms where benches are wiped with ethanol and gas flames are unwelcome

Care & Handling

  • Assemble the Technibec 2.0 pack with the burner cold and centred in the table’s enclosure before plugging in.
  • Keep plastic Petri dishes on the flat area and away from the enclosure, where the heat is concentrated.
  • Wipe the table with disinfectant only after switching off, and let alcohol-based wipes dry before switching on again.
  • Unplug and allow both parts to cool before lifting the table off the burner.

Specifications

Pack contents Technibec 2.0 electric burner and microbiology table
Table Raised top on legs with a central slatted enclosure for the burner (photo)
Tube holding Row of holes along the front edge (photo)
Working area Flat space beside the burner for Petri dishes (photo)
Supply voltage and plug Confirm at enquiry

Why Choose LabEquip

Microbiology teachers setting up several identical student stations tend to order the Technibec 2.0 as this pack rather than as separate items. It belongs to LabEquip’s chemistry lab equipment range; say how many stations you need on the contact page.

Frequently Asked Questions

What is in the Technibec 2.0 pack?

It pairs the Technibec 2.0 electric burner with its microbiology table. The table can also be bought separately by schools that already own the burner.

Does the table heat anything itself?

No. It has no element of its own. The heat comes from the Technibec burner in the centre, and the table organises tubes and dishes around it.

Can the burner be used without the table?

Yes. Lifted out of the table, the Technibec 2.0 works as an ordinary electric bench burner for heating test tubes and small vessels in chemistry lessons.

Why use an electric burner for microbiology?

Benches are often wiped with ethanol, and an open gas flame beside wet disinfectant is a fire risk. An electric burner removes the flame, although its hot surfaces can still ignite vapour, so wipes must dry first.

How is a loop sterilised at this station?

Hold the wire loop in the burner’s heating zone until the whole wire glows red, let it cool in the air for a few seconds, then take the sample. Sterilise the loop again after use before putting it down.

Where should Petri dishes be placed?

On the flat area beside the burner, close enough to work near the heat but not touching the enclosure. Plastic dishes soften and distort if they are pushed against hot parts.

Last Updated: September 2026

Replacement Spare Parts For Sérénit Electric Spout

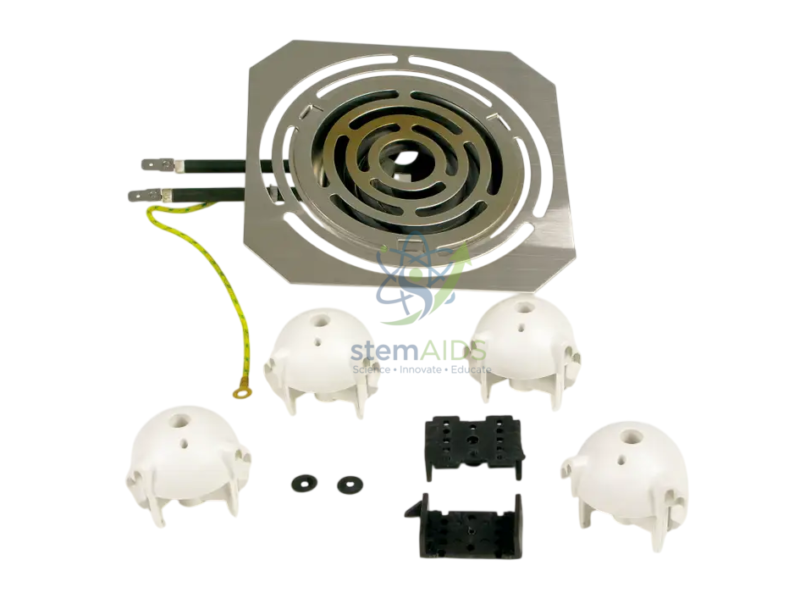
Quick Answer: These Serenit burner spare parts are replacement components for the Sérénit electric burner, listed as ‘Replacement Spare Parts For Sérénit Electric Spout’. The listing photo shows a spiral heating element set in a slotted square top plate with connection leads, plus white domed plastic fittings, black connector blocks and small washers.

What the Spare Parts Set Contains

‘Spout’ in the title is a literal translation of the French ‘bec’, meaning burner, so the set belongs to the Sérénit electric burner. The largest part in the photo is the heating assembly: a flat spiral element seated in a square metal plate cut with curved ventilation slots, with two insulated leads ending in spade terminals and a separate green-and-yellow earth wire with a ring terminal.

The smaller items are harder to identify from a photograph alone. Four white domed plastic pieces with clips at their base look like feet or insulating mounts for the housing, two black moulded blocks look like connector or terminal housings, and there are two small black washers. Check each part against the burner before ordering, since the listing does not name them individually.

Replacing a heating element is an electrical repair. It should be done by someone competent in appliance repair, with the burner unplugged and cold, and the finished unit should pass an electrical safety check, including earth continuity, before it returns to a classroom. A bent or damaged protection grid is a separate item with its own listing.

Specifications

Item Replacement parts set for the Sérénit electric burner
Heating assembly Spiral element in a slotted square top plate, with spade-terminal leads (photo)
Earth lead Green-and-yellow wire with ring terminal (photo)
Small parts Four white domed plastic fittings, two black connector blocks, two washers (photo)
Fit for your burner version Confirm at enquiry

Applications

  • Restoring a Sérénit burner whose element no longer heats evenly or shows visible damage
  • Replacing cracked plastic feet or mounts that leave a burner unstable on the bench
  • Keeping a small stock of parts in schools that run class sets of Sérénit burners
  • Holiday maintenance carried out by a school or college laboratory technician

Care & Handling

  • Unplug the Sérénit burner and let it cool fully before opening the housing or touching the element.
  • Photograph the wiring before disconnecting anything, so the new element and the earth lead go back in the same way.
  • Have the repaired burner tested for earth continuity and insulation before students use it.
  • Store unused parts in a labelled bag so that small washers and connectors are not lost.

Why Choose LabEquip

Science departments that have standardised on Sérénit electric burners buy this set to keep burners in service instead of replacing whole units. The parts appear in LabEquip’s chemistry equipment listings; send the burner’s model details through the contact page so the parts can be checked against it.

Frequently Asked Questions

What is included in the spare parts set?

The listing photo shows a heating element in a slotted square top plate with leads and an earth wire, four white domed plastic fittings, two black connector blocks and two small washers. The individual parts are not named, so compare them with your burner before ordering.

Why does the title say Electric Spout?

Spout is a literal translation of the French word bec, which also means burner. The parts are for the Sérénit electric burner, not for a spout of any kind.

Can a teacher replace the heating element?

Only someone competent in electrical appliance repair should do it. The element connects to mains wiring and an earth lead, so a technician should fit it and the burner should be safety tested before it is used again.

How can I tell that the element needs replacing?

Typical signs are a spiral that no longer glows evenly, visible cracks or distortion in the element, or a burner that stays cold although it is switched on. Unplug the unit and have it inspected before ordering parts.

Why is the earth wire important?

The earth lead connects the metal top plate to the earth pin of the plug. If a live wire ever touched the plate, current would flow to earth and trip the protection instead of passing through a person.

Are the white domed pieces feet?

From the photo they appear to be feet or insulating mounts that clip into the housing. Their position can differ between burner versions, so compare them with the old parts before removing anything.

Last Updated: September 2026

Ecoflam Pastilles (Set of 41)

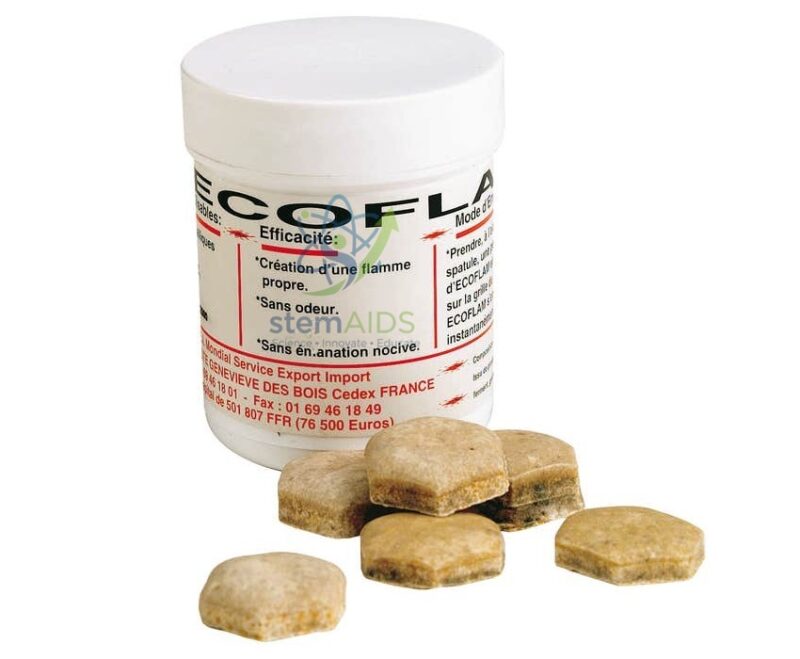
Quick Answer: Ecoflam pastilles are small solid fuel tablets that catch fire when placed on the grid of a hot electric laboratory burner, giving a small open flame for a limited time. The listing photo shows a white jar with a French label and several tan, hexagonal pastilles; the listing sells them as a set of 41.

Why a Flame Is Still Useful in a Gas-Free Lab

Electric burners heat without a flame. That removes gas pipes from the room, but it also removes something a few practicals rely on: a visible, open flame. Ecoflam pastilles fill that gap. The directions printed on the jar, in French, describe lifting one pastille with a spatula and laying it on the grid, where it ignites straight away. On a Sérénit electric burner, the hot element supplies the ignition and the pastille then burns as a small fuel source.

Typical reasons for wanting the flame are lighting a wooden splint for the hydrogen ‘pop’ test or the glowing-splint test for oxygen, showing younger students what combustion looks like next to flameless heating, and demonstrations where the teacher’s protocol calls for a flame close to the work. One pastille at a time is enough for each of these.

The listing does not state what the pastilles are made of or how long each one burns. Treat them as a flammable solid, read the product’s safety data sheet before first use, and run a trial with a single pastille so that you know how long its flame lasts before planning a lesson around it.

Specifications

Item Ecoflam solid fuel pastilles for use on electric burners
Quantity Set of 41, as stated in the listing title
Form Small tan hexagonal tablets in a lidded white jar (photo)
Ignition Placed on the hot burner grid, per the directions on the jar (photo)
Composition and burn time Confirm at enquiry

Care & Handling

  • Handle Ecoflam pastilles with a spatula or tongs, never with fingers, and place only one on the burner at a time.
  • Keep the jar closed and well away from the burner while the practical is running.
  • Never add a fresh pastille to one that is still burning; let the burner cool before removing residue.
  • Keep ethanol, disinfectant wipes and other flammable liquids clear of the bench while a pastille is alight.

Applications

  • Lighting wooden splints for gas tests in a room that no longer has gas taps
  • Showing a class the difference between flameless electric heating and a burning fuel
  • Providing a small flame beside an electric burner during demonstrations whose protocol calls for one
  • Combustion lessons in which students observe a flame and the residue left once it goes out

Why Choose LabEquip

Schools that have replaced gas taps with Sérénit or similar electric burners, yet still need an occasional flame, are the usual buyers of Ecoflam pastilles. They sit among LabEquip’s chemistry lab equipment listings; for larger quantities or safety data, write to us through the contact page.

Frequently Asked Questions

How is an Ecoflam pastille lit?

The directions on the jar describe placing one pastille with a spatula on the grid of the electric burner, where it catches fire from the heat. No match or lighter is needed once the burner is hot.

Why use a pastille when the electric burner is already hot?

The burner gives heat but no flame. A pastille adds a visible open flame for tasks that need one, such as lighting a splint, or for demonstrations where students must see combustion happening.

Can a pastille be put out and reused?

It is safer to let each pastille burn out completely on the burner. Trying to smother or move a burning pastille risks burns and scattered hot fragments, so start the next task with a fresh one.

Do the pastilles light on a cold burner?

They need a source of ignition, and the jar directions rely on the heat of the electric burner. Switch the burner on and let it reach working temperature before placing a pastille on it.

How should the jar be stored?

Keep it tightly closed in a cool, dry cupboard away from heaters, oxidising chemicals and direct sunlight. Damp tablets can be harder to light, and the jar should never stand beside a burner in use.

Are the fumes safe in a classroom?

Any burning fuel uses oxygen and produces combustion gases, so work in a well-ventilated room. The composition is not given in the listing, so read the product’s safety data sheet before first use.

Last Updated: September 2026

Reaction plate for Sérénit electric burner

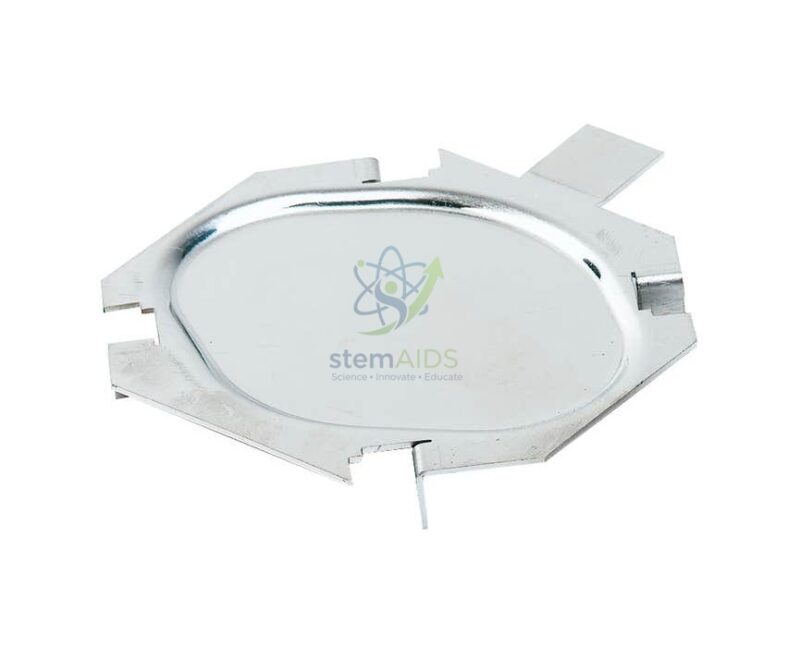
Quick Answer: The Serenit reaction plate, listed as ‘Reaction plate for Sérénit electric burner’, is a shallow, dished metal plate that rests over the burner’s heating element. The listing photo shows a bright metal dish with an angular rim, bent locating tabs and a flat handle tab, used to heat small quantities of solids in full view of a class.

A Shallow Dish That Sits on the Heat

On a gas burner, a solid is usually heated in a crucible on a pipe-clay triangle or in a test tube held in the flame. The Sérénit electric burner has a flat spiral element instead of a flame, and this plate is made to rest over it. In the photo the plate has a shallow circular well pressed into its centre, a rim cut into straight segments, small tabs bent downwards to locate it on the burner, and a flat tab projecting from one side for lifting.

Because the well is open and shallow, everyone around the bench can see what happens to the sample: blue crystals turning white as their water of crystallisation is driven off, a solid melting and then charring, or a powder changing colour as it decomposes. Thin metal passes heat into the sample quickly, so changes begin soon after the burner is switched on.

The reaction plate has a different job from the solid fuel burning plate, which holds fuels such as charcoal while they burn. This one is for heating and decomposing small samples to watch a chemical change. Anything that releases irritant or toxic gas belongs in a fume cupboard, whichever plate is used.

Applications

  • Heating blue hydrated copper(II) sulfate until it turns white, then adding a drop of water to reverse the change
  • Comparing how sugar, salt and candle wax behave when heated: melting, charring or no visible change
  • Thermal decomposition of green copper(II) carbonate to black copper(II) oxide as a class demonstration
  • Drying a small portion of a damp, heat-stable solid before weighing

Specifications

Item Reaction plate for the Sérénit electric burner
Form Shallow dished well with a segmented rim (photo)
Fitting Bent tabs that locate the plate on the burner (photo)
Handling Flat projecting tab for lifting with tongs (photo)
Finish Bright metal, as photographed

Care & Handling

  • Seat the Sérénit reaction plate on the burner while both are cold, and check that the tabs hold it level.
  • Use small amounts; the tip of a spatula of solid is enough to see a change.
  • Lift the plate only with tongs by its handle tab, and set it down on a heat-resistant mat to cool.
  • Scrape out residues once cold and wash the plate before the next class; soak stubborn deposits rather than scouring hard.

Why Choose LabEquip

Teachers who have moved to Sérénit electric burners but still want to show dehydration and thermal decomposition reactions buy this plate. LabEquip includes it in the chemistry range, and you can match plate numbers to your burners through the contact page.

Frequently Asked Questions

What can be heated on the reaction plate?

Small amounts of solids such as hydrated salts, carbonates, sugar or wax. Keep each sample to a spatula tip, and heat anything that gives off irritant gases only in a fume cupboard.

Can liquids be heated on it?

The well is shallow, so only a few drops fit and they may spit as they boil. For solutions, use an evaporating basin or a small beaker supported safely over the burner instead.

Will the plate fit burners other than the Sérénit?

It is listed for the Sérénit electric burner, and its tabs are shaped to locate on that unit. Fit on other burners should not be assumed, because a plate that is not seated properly can slide off a hot element.

How is it different from the solid fuel burning plate?

The solid fuel plate holds fuels such as charcoal or wood while they burn. The reaction plate is a dished well for heating and decomposing small samples, where the aim is to watch a chemical change rather than a combustion.

Why does blue copper sulfate turn white on the plate?

Blue copper(II) sulfate crystals contain water of crystallisation. Heating drives that water off and leaves white anhydrous copper(II) sulfate; adding a drop of water back restores the blue colour and gives out heat.

How should the plate be cleaned?

Let it cool completely, scrape off loose residue, then wash it with warm water and detergent. Soaking loosens baked-on deposits; avoid harsh scouring, which roughens the surface so that later residues stick.

Last Updated: September 2026

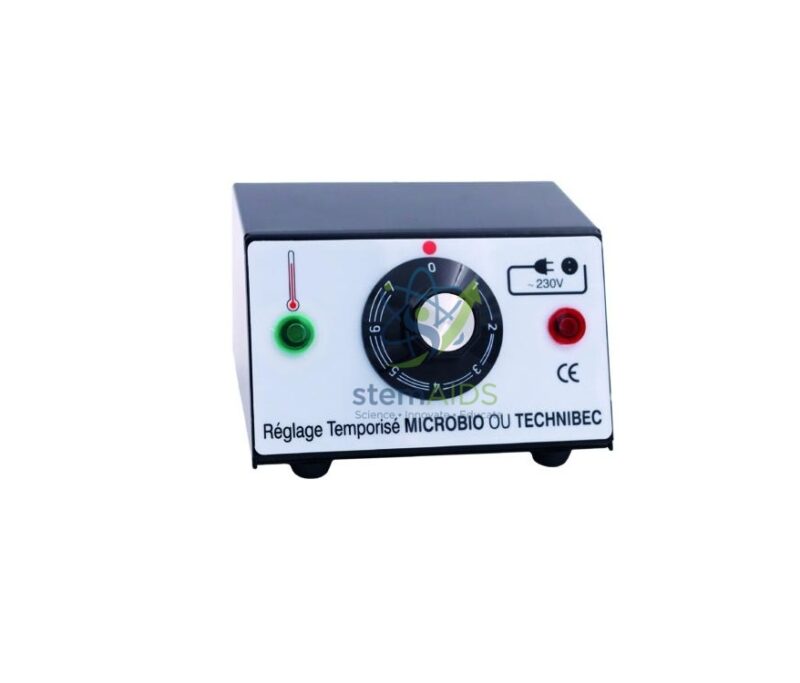
Electric Beak Dimmer

Quick Answer: The electric burner dimmer, listed as ‘Electric Beak Dimmer’, is a bench control box that sets the heat output of a compatible electric laboratory burner. Its front panel in the listing photo is printed ‘Réglage Temporisé MICROBIO OU TECHNIBEC’, naming the two burner families it is meant for, and carries a numbered dial between two indicator lamps.

Reading the Panel: What This Dimmer Controls

‘Beak’ in the title is the French ‘bec’ once more, the ordinary word for a laboratory burner, so this is a dimmer for an electric burner. The panel states its purpose in French: ‘réglage temporisé’, roughly ‘timed adjustment’, followed by the names MICROBIO and TECHNIBEC. In this range those names point to the LAB Microbiology electric Bunsen burner and the Technibec 2.0 electric burner.

The photo shows a small dark box with a white front panel. A rotary dial with a numbered scale sits in the middle, with a green lamp marked by a thermometer symbol on its left and a red lamp on its right, and a plug-and-socket symbol in the top corner. Regulators described as ‘temporisé’ generally vary heat by switching the heater on and off in timed cycles rather than dimming it continuously, so a low setting gives short heating periods with longer pauses between them. Follow the instructions supplied with the unit for the exact behaviour.

Why regulate at all? Sterilising a wire loop needs full heat, but many chemistry tasks do not: warming a broth tube, evaporating a few millilitres of solution, or holding a small beaker of water below the boil. With the dimmer placed between the wall socket and the burner, one burner can cover both kinds of work. The panel names only the Microbio and Technibec models, so use with other burners should not be assumed.

Specifications

Item Timed power regulator (‘dimmer’) for electric laboratory burners
Listed as Electric Beak Dimmer
Panel marking ‘Réglage Temporisé MICROBIO OU TECHNIBEC’ (photo)
Controls Numbered rotary dial; green heat lamp and red lamp (photo)
Mains rating and plug type Confirm at enquiry

Applications

  • Setting a Technibec burner to low heat for warming tubes of culture medium without boiling them over
  • Gentle evaporation of salt or copper sulfate solution in a small dish before crystallisation
  • Switching one Microbio burner between loop sterilising at full setting and slow warming at a low one
  • Keeping the heat modest during younger students’ first heating practical

Care & Handling

  • Connect the electric burner dimmer only to a Microbio or Technibec burner, as named on its panel; never plug in hot plates, kettles or other heaters.
  • Turn the dial to zero before connecting or disconnecting the burner.
  • Keep the control box to one side of the burner, out of the rising heat and away from spills.
  • Unplug both units after use and include them in the school’s routine electrical safety inspections.

Why Choose LabEquip

Schools that already own Microbio or Technibec electric burners buy this dimmer when a single fixed heat is not enough for their practicals. It is listed with LabEquip’s chemistry lab equipment; tell us which burner model you use through the contact page so the plug and supply can be matched.

Frequently Asked Questions

Which burners does this dimmer work with?

The panel is printed with the names MICROBIO and TECHNIBEC, so it is intended for those electric burner models. Other burners, including the Hofmann burner that has its own regulator, should not be connected unless compatibility has been confirmed.

Why is it called a beak dimmer?

Beak is a mistranslation of the French word bec, which means burner. The item is a dimmer, or power regulator, for an electric laboratory burner and has nothing to do with a beak.

What does réglage temporisé mean?

It translates roughly as timed adjustment. Regulators described this way usually control heat by switching the burner on and off in cycles, with longer on periods at higher settings, rather than lowering the power continuously.

Is a low setting enough to sterilise an inoculating loop?

Sterilising a loop needs the whole wire to glow red, which is normally done at full heat. Keep the lower settings for warming and evaporating, and turn the dial up before flaming loops.

Can the dimmer make a burner hotter than normal?

No. A regulator can only reduce the power reaching the burner, so its highest setting gives at most the burner’s normal full output. It cannot push a burner beyond its own design.

Can I leave the burner running on a low setting unattended?

No. Even at a low setting the burner surface gets hot enough to burn skin or ignite paper and solvent vapour. Turn the dial to zero and unplug when the practical ends.

Last Updated: September 2026

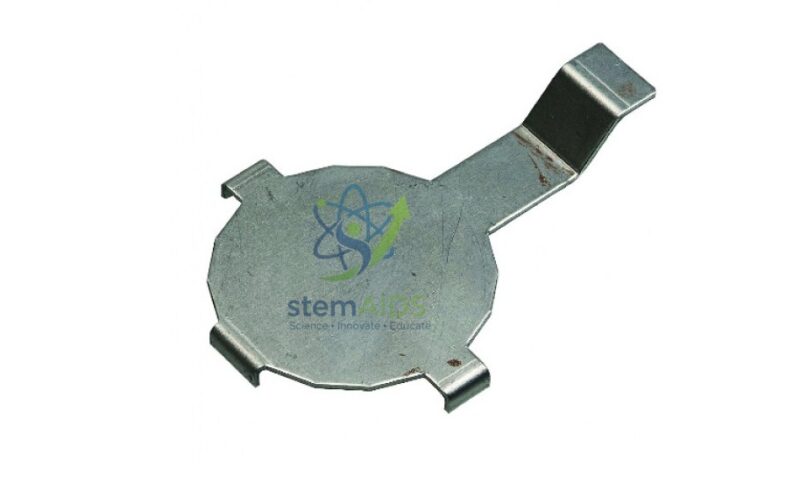
Solid Fuel Burning Plate

Quick Answer: The solid fuel burning plate is a small round metal plate with an angled handle and bent tabs, used to hold a solid sample in the heat of a burner. Students can watch small pieces of fuel, such as charcoal or wood, ignite, burn and leave ash without anyone handling the sample directly.

A Holder for Burning Solids

Liquids go in test tubes and gases in jars, but a solid that must burn in the open needs something flat to sit on. The solid fuel burning plate provides that. In the listing photo it is a round metal disc with short tabs bent downwards around the rim and a flat handle angled up from one side, a shape that lets it seat over a burner and be lifted off by the handle.

Typical samples are small: a piece of charcoal, a wood shaving, a strip of paper or a little candle wax. Placed on the plate and heated from below, each sample can be watched as it chars, ignites and burns down to ash or residue, and the results compared side by side.

Compared with the metal powder combustion set, which pairs a slotted plate with a blade for powders, this plate is meant for lumps, shavings and small pieces. Both keep burning material off the burner itself and make the residue easy to examine once the plate has cooled.

Specifications

Item Plate for heating and burning small solid samples
Form Round metal disc with bent rim tabs and an angled handle (photo)
Heat source Placed over a laboratory burner
Typical samples Charcoal, wood shavings, paper strips, wax
Burner fit Confirm at enquiry

Applications

  • Comparing how quickly different solid fuels ignite and how much ash each leaves
  • Showing complete and incomplete combustion by watching the smoke and soot from different samples
  • Showing that charcoal glows rather than flames, because its volatile components have already been driven off
  • Heating a small solid to observe melting before burning, as with candle wax

Care & Handling

  • Use pea-sized samples; larger pieces produce more smoke and can flare beyond the plate.
  • Burn smoky or sulfur-containing samples only in a fume cupboard.
  • Move the plate with tongs or a heat-resistant glove, as the handle warms up too.
  • Tip out ash once the plate is cold and wash it before storing.

Why Choose LabEquip

Science teachers covering fuels, combustion and energy transfer are the usual buyers of the solid fuel burning plate. It sits with other chemistry lab equipment in LabEquip’s range; for help pairing it with a burner, write through the contact page.

Frequently Asked Questions

What samples can be burnt on the plate?

Small pieces of charcoal, wood, paper, card and wax are typical. Keep each sample small, and burn anything that gives heavy smoke or sulfur-containing fumes only in a fume cupboard.

Why does charcoal glow instead of producing flames?

Flames come from gases burning. Wood releases flammable gases when heated, so it flames; charcoal has already lost those volatile components, so its solid carbon burns at the surface with a glow.

Can the plate be used on an electric burner?

It is meant to sit in the heat of a laboratory burner, and the bent tabs in the photo suggest it seats over a burner opening. Check that it sits securely on your particular burner before starting.

How can the plate show incomplete combustion?

Burn a sample that smokes, such as a strip of paper or a little wax, and hold a cold evaporating basin in tongs briefly above it. Soot collecting on the basin is carbon from incomplete combustion.

Is it safe to touch the handle while the sample burns?

The handle stays cooler than the plate but still warms up. Use tongs or a heat-resistant glove to move the plate, and never lift it while a sample is still burning.

How do I clean soot and ash from the plate?

Let it cool, tip the ash into a metal bin, then scrub the plate with warm detergent solution. A soak in washing soda solution loosens stubborn soot. Dry the plate before storage to prevent corrosion.

Last Updated: September 2026

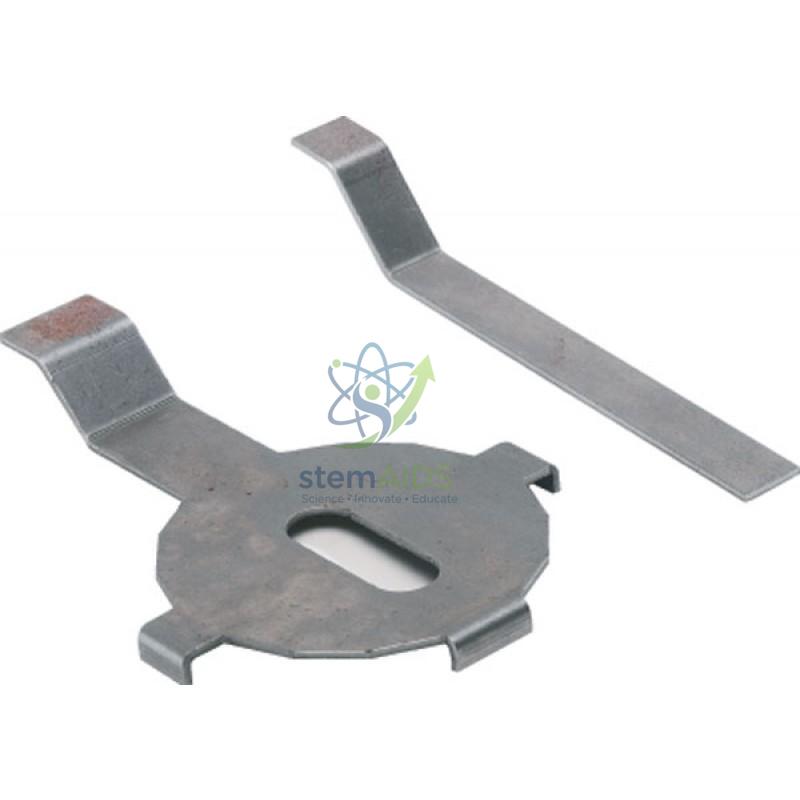
Metal Powder Combustion Together

Quick Answer: The metal powder combustion set, listed as ‘Metal Powder Combustion Together’, is a demonstration accessory made of a round metal plate with a central slot and a separate bent metal blade. It is used to show how finely divided metals such as iron burn in the heat above a burner, with the residues caught on the plate.

The Chemistry Being Demonstrated

A lump of iron will not burn in air, yet fine iron powder sprinkled into strong heat gives a shower of sparks. The difference is surface area: a powder exposes far more metal to oxygen, and each tiny particle heats up almost instantly. This metal powder combustion set gives a contained way to show that effect and to compare how different metals behave.

‘Together’ in the listing name is a mistranslation of the French ‘ensemble’, meaning set. In the photo, the set consists of a round plate with bent tabs around its rim and an oblong slot in the middle, plus a long strip bent at one end into a blade. Residues and slag from the burning powder are collected on the plate so they can be examined after the reaction; follow the supplied instructions for positioning the blade and the powder.

Useful comparisons include iron, copper and zinc; aluminium powder burns more vigorously and should be used only in small amounts by the teacher. Magnesium powder is better left out of class work, because it burns with an intensely bright light and is hard to extinguish. Zinc gives a memorable residue: its oxide is yellow while hot and white once cool.

Applications

  • Showing the effect of surface area on reaction rate by comparing iron powder with a piece of iron wire
  • Comparing how readily metals react with oxygen during a reactivity series lesson
  • Collecting and examining oxide residues, such as the colour change of zinc oxide as it cools
  • Teacher demonstrations on combustion and oxidation for secondary classes

Specifications

Item Metal powder combustion demonstration set
Listed as Metal Powder Combustion Together
Parts shown Round metal plate with central slot and rim tabs; separate bent metal blade (photo)
Purpose Burning small quantities of metal powder and collecting the residue
Metal powders Confirm at enquiry

Care & Handling

  • Use only a small pinch of powder at a time, and keep the stock bottle capped and well away from the heat.
  • Wear eye protection, and have students watch from a safe distance, behind a safety screen if one is available.
  • Never use water on burning metal; smother small metal fires with dry sand kept close by.
  • Let the plate and blade cool fully before scraping residues into a labelled container for disposal under local rules.

Why Choose LabEquip

Chemistry teachers who want a repeatable, contained way to demonstrate metal combustion and surface-area effects buy this set to use alongside a bench burner. LabEquip lists it in chemistry lab equipment next to the solid fuel burning plate; ask about pairing it with a burner through the contact page.

Frequently Asked Questions

Why does iron powder burn when an iron nail does not?

Burning needs metal and oxygen to meet. A fine powder exposes a huge surface area, and each particle is so small that it reaches ignition temperature almost at once. A nail has a small surface and its bulk carries heat away, so it only oxidises slowly.

Which metal powders are suitable for classroom demonstrations?

Small amounts of iron, copper and zinc powder are the usual choices. Aluminium powder reacts more vigorously and needs extra care. Magnesium powder burns with blinding intensity and is generally better avoided in class demonstrations.

What does the zinc residue show?

Zinc burns to zinc oxide, which is yellow while hot and turns white as it cools. It is a clear example of a product whose colour can be watched changing on the plate after the reaction.

Why is the item called ‘Together’ in the listing?

It is a translation error. The original French name used ‘ensemble’, which means set, and it was rendered as ‘together’. The product is a metal powder combustion set.

How should a metal powder fire be put out?

Do not use water, which can react with some hot metals and scatter burning particles. Switch off the heat and smother a small fire with dry sand. Keeping the amount of powder small makes a fire unlikely in the first place.

Will the colours be the same over an electric burner as over a gas flame?

Not always. Colours such as the green seen when copper powder enters a gas flame come from the flame itself being coloured, so they will not appear in the same way above an electric burner. Sparks and oxide residues are seen with either heat source.

Last Updated: September 2026

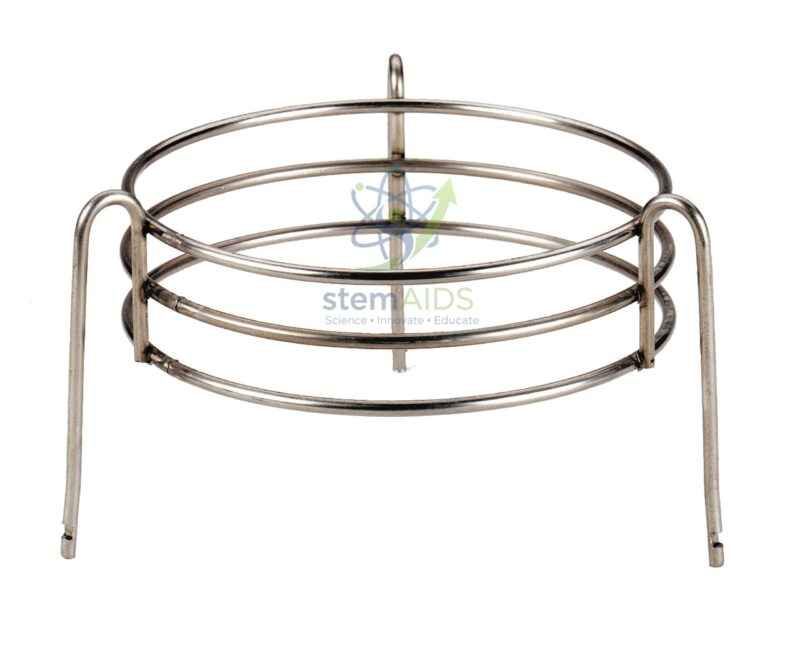
Serenit Electric Spout Protection Grid

Quick Answer: The Serenit protection grid is a wire guard for the Serenit electric burner, listed as ‘Serenit Electric Spout Protection Grid’. The listing photo shows three horizontal metal rings joined by vertical legs, forming an open cage that stands over and around the heating element.

What the Grid Protects Against

The Serenit burner’s heating element sits exposed in the top of the unit, and when it is hot it may glow only faintly or not at all. The protection grid puts a ring of wire between the element and anything that might touch it: a hand reaching across the bench, a sleeve, a worksheet or a plastic item that could melt.

Its design is open. The photo shows a cage of three rings on long legs, so heat still rises freely and a tube, loop or small vessel can be brought to the heat through the top. Compare this with the perforated cylinder of the Hofmann burner guard, which suits a differently shaped burner.

The word ‘Spout’ in the title comes from the French ‘bec’, which means both spout and burner; the grid belongs to the Serenit electric burner. Because the wire rings heat up in use, the grid reduces accidental contact with the element but does not make the burner safe to touch.

Specifications

Item Protection grid for the Serenit electric burner
Listed as Serenit Electric Spout Protection Grid
Form Three horizontal wire rings joined by vertical legs (photo)
Function Guards the heating element while leaving the top open
Finish Bright metal wire, as photographed

Applications

  • Shielding the element during practicals with younger students
  • Shared benches where several people reach past one burner
  • Class demonstrations, where the teacher moves around the burner while talking
  • Reducing the chance of worksheets or plastic items drifting onto the element

Care & Handling

  • Fit the grid with the burner off and cold, and check that it sits evenly without touching the element.
  • Do not rest heavy vessels on the rings unless the burner instructions allow it; thin wire bends.
  • Clean off residues when cold with warm detergent solution and a soft brush, then dry.
  • Straighten or replace a grid that has been bent, since a distorted ring may touch the element.

Why Choose LabEquip

Schools buying the Serenit burner for lower-secondary classes usually want the grid too, to keep hands off the element. It is part of LabEquip’s chemistry lab equipment listings, and burner, grid and rod can be requested together through the contact page.

Frequently Asked Questions

Does the protection grid stop the burner from being hot to touch?

No. It keeps hands and objects away from the element itself, but the wire rings warm up in use and can burn. Treat the grid as part of the hot zone.

Can I still heat a test tube with the grid fitted?

Yes. The top of the grid is open, so a tube held in a holder, or a wire loop, can be lowered into the heat through the rings.

Why is it described as a ‘spout’ grid?

The listing name was translated literally from French. ‘Bec’ can mean spout, but in the laboratory it means burner, so this is a protection grid for the Serenit electric burner.

Is the grid needed for adult users?

It is most useful with students and on shared benches, but anyone can brush against an exposed element. Many labs leave a grid fitted permanently and remove it only for cleaning.

Will it fit the Hofmann or Technibec burners?

It is listed for the Serenit burner. The Hofmann burner has its own cylindrical guard, and other models have their own accessories, so choose protection by burner name.

How do I clean the grid?

Remove it when cold and wash it in warm detergent solution with a soft brush. Dry it fully before refitting, and never clean it while it sits on a burner that is plugged in.

Last Updated: September 2026

Select your currency
INR Indian rupee
×

No WhatsApp Number Found!

WhatsApp us
Exit mobile version