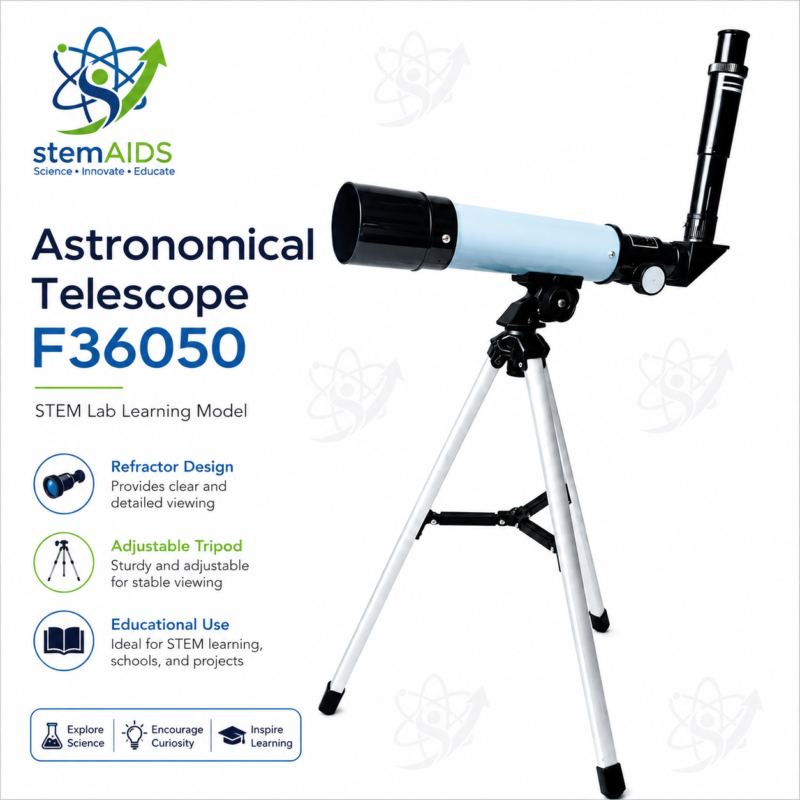
Astronomical Telescope F36050

Quick Answer: The Astronomical Telescope F36050 is a small refracting telescope in which an objective lens gathers light and an eyepiece magnifies the image. In this common model code, 360 stands for a 360 mm focal length and 50 for a 50 mm objective, a size used for first views of the Moon, bright planets and star clusters.

How a Small Refractor Forms Its Image

A refracting telescope has no mirrors. The objective lens at the front bends incoming light to a focus near the back of the tube, forming a small, real, inverted image; the eyepiece then works like a magnifying glass on that image. Changing the eyepiece changes the magnification, while the objective decides how much light is collected and how fine the detail can be.

With a 50 mm objective and a 360 mm focal length, the F36050 works at roughly f/7.2, a moderate focal ratio that gives a reasonably wide, bright field at low power. That makes the Moon easy to find and follow, which matters for students using a simple altazimuth mount. It also sets realistic limits: a 50 mm instrument shows the rings of Saturn as a small ellipse and the four largest moons of Jupiter as points of light, but faint galaxies stay out of reach from a town.

Because the image through a refractor is upside down, sky views are unaffected but landscapes look inverted unless an erecting lens is fitted. Teachers often use this to open a discussion of how lenses form real and virtual images, linking the observing session back to ray diagrams from the optics syllabus.

Specifications

Type Refracting (lens) telescope for beginners
Model code F36050: 360 mm focal length, 50 mm objective in the usual naming pattern
Focal ratio About f/7.2 (360 divided by 50)
Magnification Set by the eyepiece: telescope focal length divided by eyepiece focal length
Image orientation Inverted through a plain eyepiece; an erecting lens corrects it for land views
Mount, tripod and eyepieces supplied Confirm at enquiry

What Students Can Observe

  • Craters, mountain ranges and the day-night line (terminator) on the Moon, clearest a few days either side of first quarter
  • Jupiter as a small disc with its four Galilean moons changing position from night to night
  • The phases of Venus and the ring system of Saturn under steady skies
  • Open star clusters such as the Pleiades, and double stars for astronomy club sessions
  • Distant daytime targets, for aligning the finder and practising focusing

Care & Handling

  • Keep the dust caps on the objective and eyepiece whenever the astronomical telescope F36050 is not in use.
  • Blow loose dust off lenses with a rubber blower first; wipe only with lens tissue and a drop of lens cleaner, never with clothing.
  • Bring the telescope in from a cold night with caps on and let it warm up before uncapping, so dew does not form on the optics.
  • Carry the tube separately from the tripod and check the mounting screws before each session.

Why Choose LabEquip

Schools setting up an astronomy club, and teachers who want students to see the Moon for themselves after studying it from diagrams, usually start with a small refractor of this size. LabEquip lists it with teaching models in the Astronomy Lab Kits range, so it can be ordered with the Phases of Moon Working Model used for the indoor lesson. Send quantities and questions about accessories through the LabEquip contact page.

Frequently Asked Questions

What does F36050 mean on this telescope?

In the naming pattern used for beginner refractors, the first three digits give the focal length and the last two the objective diameter, both in millimetres: 360 mm and 50 mm. Dividing one by the other gives a focal ratio of about f/7.2.

How much magnification does it give?

Magnification depends on the eyepiece. Divide the 360 mm focal length by the eyepiece focal length: a 20 mm eyepiece gives 18x and a 6 mm eyepiece 60x. Low power is brighter, steadier and much easier for students to aim.

Can students look at the Sun through it?

No. Pointing any telescope at the Sun can cause instant, permanent eye damage and can overheat the eyepiece. Solar viewing needs a purpose-made full-aperture solar filter fitted over the front of the tube, used under direct teacher supervision.

Why does the image appear upside down?

A refractor with a simple eyepiece produces an inverted image, which makes no difference when viewing the Moon or planets. For landscapes an erecting lens or erect-image diagonal turns the view the right way up.

How do I line up the finder?

Do it in daylight. Centre a distant treetop or tower in the main telescope at low power, then adjust the finder screws until the same object sits in the finder crosshairs. At night the finder will then point where the telescope points.

Why do stars look blurred or wobbly?

Common causes are a telescope that has not cooled to outdoor temperature, viewing over warm roofs or roads, and too much magnification for the conditions. Wait 15 to 20 minutes after setting up, use lower power and check the focus again.

Last Updated: September 2026

Resonance Box with Tuning Forks

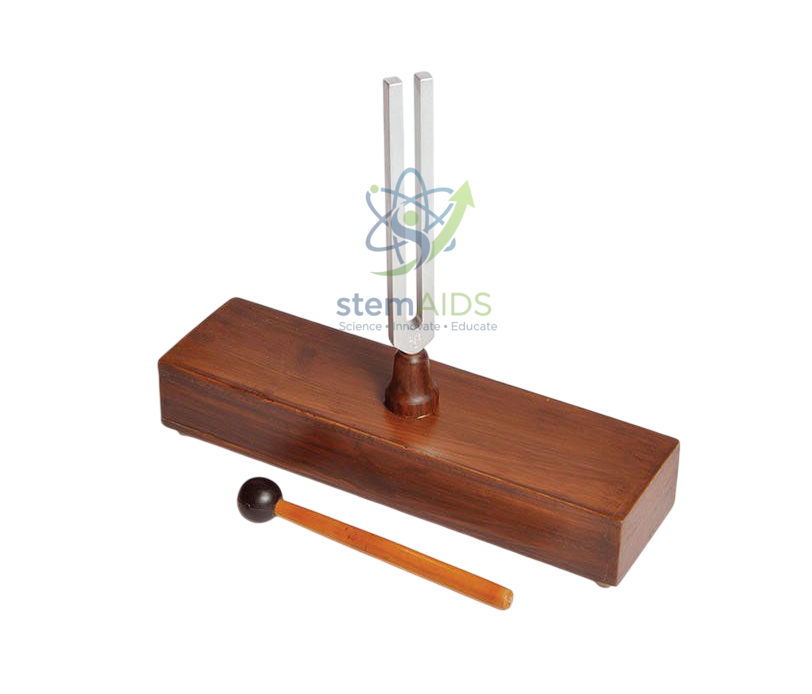
StemAids Resonance Box with Tuning Forks is an educational physics laboratory apparatus designed to demonstrate resonance, vibration, sound amplification, frequency, pitch, wave motion, and acoustic energy transfer. It is suitable for school science laboratories, college physics classrooms, STEM labs, general science practicals, and teacher-led sound experiments.

The resonance box helps amplify the sound produced by a vibrating tuning fork. When the stem of a struck tuning fork is placed on the resonance box, the box vibrates sympathetically and increases the loudness of the sound, helping students clearly observe the principle of resonance and sound reinforcement.

Product Highlights

  • Educational resonance box with tuning forks for physics sound experiments
  • Useful for demonstrating resonance, vibration, frequency, pitch, and sound amplification
  • Suitable for school, college, STEM, and general science laboratories
  • Helps students understand how vibrating bodies produce and transfer sound energy
  • Can be used for classroom demonstrations, practical exams, and science projects
  • Recommended for teacher-supervised sound and acoustics experiments

Product Description

The StemAids Resonance Box with Tuning Forks is designed to make sound and vibration concepts easier to understand through direct classroom observation. A tuning fork produces sound when its prongs vibrate at a fixed frequency. When the vibrating tuning fork is placed on the resonance box, the box responds to the vibration and makes the sound louder.

This apparatus is useful for explaining resonance, natural frequency, sound wave production, pitch, frequency comparison, and vibration transfer. It helps students understand why certain objects vibrate strongly when exposed to matching frequencies and how resonance is used in musical instruments and acoustic systems.

StemAids provides educational science products that support hands-on learning, practical observation, and concept-based classroom teaching. The Resonance Box with Tuning Forks is suitable for physics departments, science laboratories, STEM classrooms, music-science demonstrations, and institutional procurement.

Product Specifications

Product Name Resonance Box with Tuning Forks
Brand StemAids
Product Type Educational sound and resonance demonstration apparatus
Application Resonance demonstration, sound amplification, frequency study, vibration experiment, pitch comparison, and classroom acoustics practicals
Concept Covered Sound, vibration, resonance, frequency, pitch, amplitude, sound waves, and acoustic energy transfer
Typical Components Resonance box, tuning forks, rubber mallet or striker, and related accessories as per supplied configuration
Frequency Options Available tuning fork frequencies may vary according to the supplied set configuration
Recommended Use School physics labs, college science labs, STEM classrooms, general science labs, and training laboratories
Subject Area Physics, sound science, acoustics, general science, wave motion, music-science learning, and STEM education
Suitable For Students, teachers, lab assistants, physics instructors, STEM educators, and educational institutions
Usage Type Educational laboratory demonstration and classroom practical use
Cleaning Instruction Wipe the resonance box and tuning forks gently with a soft dry cloth after use
Storage Instruction Store in a clean, dry place away from moisture, chemicals, heat, impact, and rough handling

How to Use

  1. Place the StemAids Resonance Box on a clean, stable, and flat laboratory table.
  2. Select the required tuning fork according to the frequency or experiment objective.
  3. Hold the tuning fork by its stem and avoid touching the vibrating prongs.
  4. Strike one prong gently with a rubber mallet or approved soft striker.
  5. Bring the vibrating tuning fork near the ear carefully to hear the original sound.
  6. Place the stem of the vibrating tuning fork on the resonance box.
  7. Observe how the sound becomes louder due to resonance and vibration transfer.
  8. Repeat the experiment with different tuning forks, if supplied, to compare pitch and frequency.
  9. Record observations such as loudness, pitch, vibration duration, and resonance effect.
  10. After use, wipe the tuning forks and box clean and store them safely.

Safety and Care Instructions

  • Use under teacher or laboratory supervisor guidance during student practicals.
  • Strike tuning forks only with a rubber mallet or approved soft striker.
  • Do not strike tuning forks against hard metal, glassware, sharp edges, or laboratory benches.
  • Do not place vibrating prongs too close to the ear, face, or eyes.
  • Handle the tuning forks carefully to avoid bending the prongs, as this may affect frequency accuracy.
  • Keep the resonance box away from moisture, direct flame, chemicals, and rough handling.
  • Do not overload, drop, or strike the resonance box forcefully.
  • Store the complete set properly after use to prevent scratches, corrosion, or missing parts.
  • This product is intended for educational sound demonstrations and classroom learning only.

Applications

  • Resonance demonstrations
  • Sound amplification experiments
  • Frequency and pitch comparison
  • Vibration and sound wave study
  • Acoustics classroom lessons
  • Energy transfer through vibration
  • Physics practical classes
  • STEM sound experiments
  • Music and science interdisciplinary learning
  • School and college laboratory procurement

Why Choose StemAids Resonance Box with Tuning Forks?

StemAids offers educational science instruments designed to support hands-on learning, classroom demonstrations, and clear concept understanding. The StemAids Resonance Box with Tuning Forks helps students observe how resonance increases sound intensity and how vibration transfers energy through connected materials.

  • Useful teaching aid for sound, waves, and resonance lessons
  • Helps students understand sound amplification through direct observation
  • Supports practical physics and STEM learning activities
  • Suitable for school, college, and training laboratory use
  • Convenient product for science labs, educational institutions, and laboratory suppliers

SEO Title

StemAids Resonance Box with Tuning Forks for Physics Lab, Sound Wave and Resonance Experiments

Meta Description

Buy StemAids Resonance Box with Tuning Forks for physics labs, sound wave experiments, resonance demonstrations, frequency study, vibration practicals, acoustics lessons, and STEM learning.

SEO Keywords

StemAids Resonance Box with Tuning Forks, Resonance Box for Physics Lab, Tuning Fork Resonance Box, Sound Wave Demonstration Apparatus, Frequency and Resonance Experiment, Physics Lab Sound Equipment, Acoustics Teaching Apparatus, STEM Sound Experiment Kit, School Science Lab Equipment, Educational Resonance Apparatus.

Frequently Asked Questions

1. What is the StemAids Resonance Box with Tuning Forks used for?

It is used to demonstrate resonance, sound amplification, vibration, frequency, pitch, sound waves, and acoustic energy transfer during physics and general science practicals.

2. How does a resonance box work with a tuning fork?

When a vibrating tuning fork is placed on the resonance box, the box vibrates along with the fork and amplifies the sound, making it louder and easier to observe.

3. Is this apparatus suitable for school physics laboratories?

Yes, the StemAids Resonance Box with Tuning Forks is suitable for school science labs, college physics labs, STEM classrooms, and teacher-supervised demonstrations.

4. What concepts can students learn using this apparatus?

Students can learn about resonance, natural frequency, vibration, sound wave production, pitch, frequency, amplitude, and sound energy transfer.

5. Can the tuning forks be used separately?

Yes, tuning forks can also be used separately for sound, vibration, pitch, and frequency demonstrations. The resonance box is used when sound amplification or resonance needs to be shown clearly.

6. How should tuning forks be struck?

Tuning forks should be struck gently with a rubber mallet or approved soft striker. They should not be hit against hard metal, glass, or rough surfaces.

7. Can students use this apparatus independently?

Students should use the apparatus under teacher or laboratory supervisor guidance to ensure correct striking method, safe handling, and accurate observation.

8. How should the resonance box and tuning forks be stored?

After use, wipe the box and tuning forks with a soft dry cloth and store them in a clean, dry place or protective case to prevent moisture damage, corrosion, bending, or impact.

9. Is this product suitable for certified acoustic calibration?

No, StemAids Resonance Box with Tuning Forks is intended for educational laboratory and classroom demonstrations. For certified acoustic calibration or professional sound measurement, use calibrated reference instruments.

Tuning Fork Sets

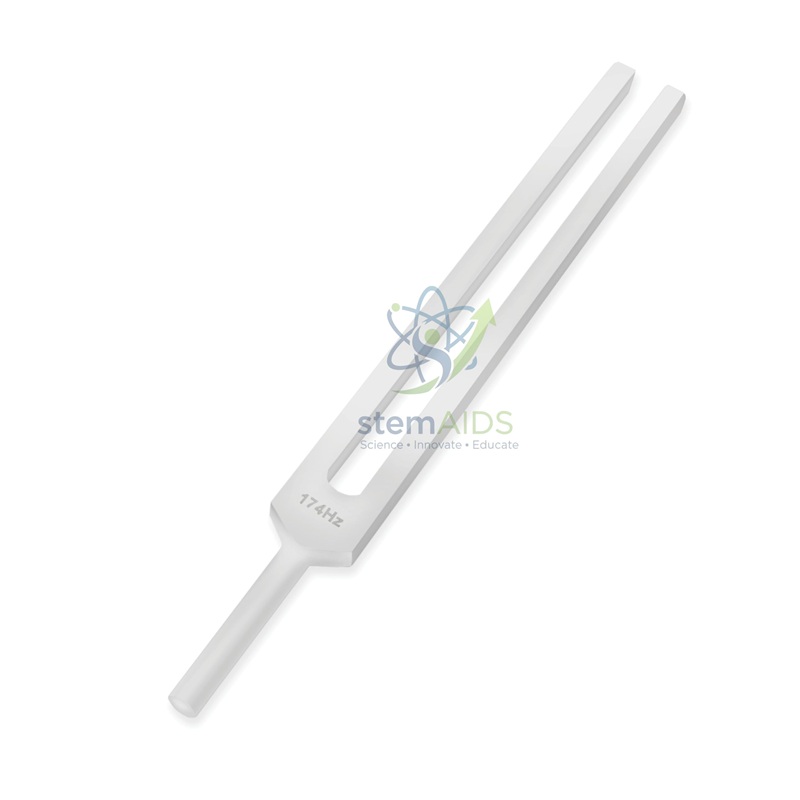
StemAids Tuning Fork Sets are educational sound and vibration instruments designed for demonstrating frequency, pitch, resonance, sound waves, vibration, beats, and basic acoustics principles in physics and general science laboratories. These sets are suitable for school science labs, college physics classrooms, STEM laboratories, music-science demonstrations, and teacher-led practical sessions.

Each tuning fork in the set produces a specific frequency when struck gently. By comparing different tuning forks, students can observe how frequency affects pitch, how vibrating objects produce sound, and how resonance can amplify sound when used with a resonance box, sound box, or air column setup.

Product Highlights

  • Educational tuning fork set for physics sound and vibration demonstrations
  • Useful for teaching frequency, pitch, resonance, beats, and sound waves
  • Suitable for school, college, STEM, and general science laboratories
  • Helps students compare tones produced by different frequencies
  • Can be used with resonance boxes, rubber mallets, sound boxes, and air column experiments
  • Recommended for teacher-supervised classroom and laboratory practicals

Product Description

The StemAids Tuning Fork Sets are designed to help students understand sound production through direct observation and listening. When a tuning fork is struck gently with a soft striker, its prongs vibrate at a fixed frequency and produce a clear tone. This makes the set useful for explaining the relationship between vibration, frequency, pitch, loudness, and sound energy.

In classroom experiments, tuning fork sets can be used to compare low and high pitch, demonstrate resonance, study sound transmission through solids, and observe beats using two forks of slightly different frequencies. They are also useful for introducing wave motion, acoustics, musical sound, and vibration-based science concepts.

StemAids provides educational science products that support hands-on learning, practical observation, and concept-based classroom teaching. StemAids Tuning Fork Sets are suitable for physics departments, school science laboratories, STEM activity rooms, music-science learning, and institutional procurement.

Product Specifications

Product Name Tuning Fork Sets
Brand StemAids
Product Type Educational sound and vibration demonstration set
Application Sound wave experiments, frequency comparison, resonance study, beat frequency activities, pitch demonstration, and classroom acoustics practicals
Concept Covered Sound, vibration, frequency, pitch, resonance, beats, wave motion, energy transfer, and acoustics basics
Frequency Options Multiple tuning forks with different frequencies as per supplied set configuration
Typical Accessories Rubber mallet, storage case, resonance box, sound box, or other accessories as per supplied set configuration
Recommended Use School physics labs, college science labs, STEM classrooms, general science labs, and training laboratories
Subject Area Physics, sound science, acoustics, general science, music-science learning, and STEM education
Suitable For Students, teachers, lab assistants, physics instructors, STEM educators, and educational institutions
Usage Type Educational laboratory demonstration and classroom practical use
Cleaning Instruction Wipe each tuning fork gently with a soft dry cloth after use and keep free from dust, moisture, and chemical exposure
Storage Instruction Store in a clean, dry place or protective case to prevent bending, corrosion, impact, or frequency damage

How to Use

  1. Select the required StemAids tuning fork from the set according to the frequency or experiment objective.
  2. Hold the tuning fork gently by the stem and avoid touching the vibrating prongs.
  3. Strike one prong lightly with a rubber mallet or suitable soft striker.
  4. Bring the vibrating fork near the ear carefully to hear the tone.
  5. Place the stem on a resonance box, sound box, or tabletop to demonstrate sound amplification.
  6. Compare different tuning forks to observe changes in pitch and frequency.
  7. Use two tuning forks of close frequencies, if available, to demonstrate beat sound.
  8. Use the tuning fork with an approved air column, water column, or resonance setup under teacher guidance.
  9. Record observations such as pitch, vibration time, resonance effect, loudness, and beat pattern.
  10. After use, wipe the forks clean and return them to the storage case or laboratory cabinet.

Safety and Care Instructions

  • Use under teacher or laboratory supervisor guidance during student practicals.
  • Strike tuning forks only with a rubber mallet or approved soft striker.
  • Do not hit tuning forks against hard metal, glassware, sharp edges, or laboratory benches.
  • Do not place vibrating prongs too close to the ear, face, or eyes.
  • Handle carefully to avoid bending the prongs, as this may affect frequency accuracy.
  • Keep away from corrosive chemicals, excessive moisture, heat, and rough handling.
  • Store each fork properly after use to prevent scratches, rust, or impact damage.
  • This product is intended for educational sound demonstrations and classroom learning only.

Applications

  • Sound and vibration demonstrations
  • Frequency and pitch comparison
  • Resonance experiments
  • Beat frequency demonstrations
  • Sound wave and acoustics lessons
  • Energy transfer through vibration
  • Physics practical classes
  • STEM science activities
  • Music and science interdisciplinary learning
  • School and college laboratory procurement

Why Choose StemAids Tuning Fork Sets?

StemAids offers educational science instruments designed to support hands-on learning, classroom demonstrations, and clear concept understanding. StemAids Tuning Fork Sets help students observe sound production directly and compare vibration, frequency, pitch, resonance, and beats through practical activities.

  • Useful teaching aid for sound, wave, and acoustics lessons
  • Multiple forks allow better frequency and pitch comparison
  • Supports hands-on physics and STEM demonstrations
  • Suitable for school, college, and training laboratory use
  • Convenient product for science labs, educational institutions, and laboratory suppliers

SEO Title

StemAids Tuning Fork Sets for Physics Lab, Sound Wave, Frequency and Resonance Experiments

Meta Description

Buy StemAids Tuning Fork Sets for physics labs, sound wave experiments, frequency comparison, resonance demonstrations, beat frequency study, acoustics lessons, and STEM learning.

SEO Keywords

StemAids Tuning Fork Sets, Tuning Fork Set for Physics Lab, Sound Wave Demonstration Set, Frequency Tuning Fork Set, Resonance Experiment Tuning Forks, Physics Lab Sound Equipment, Acoustics Teaching Instruments, STEM Sound Experiment Kit, School Science Lab Equipment, Educational Tuning Fork Sets.

Frequently Asked Questions

1. What are StemAids Tuning Fork Sets used for?

StemAids Tuning Fork Sets are used to demonstrate sound production, vibration, frequency, pitch, resonance, beats, and basic acoustics concepts during physics and general science practicals.

2. Are these tuning fork sets suitable for school physics laboratories?

Yes, they are suitable for school science labs, college physics labs, STEM classrooms, general science practicals, and teacher-supervised demonstrations.

3. How does a tuning fork produce sound?

A tuning fork produces sound when its prongs vibrate after being struck gently. These vibrations create sound waves in the surrounding air.

4. Why are multiple tuning forks included in a set?

Multiple tuning forks allow students to compare different frequencies and pitches, making it easier to understand how frequency affects sound.

5. Can tuning fork sets be used to demonstrate resonance?

Yes, tuning forks can be used with resonance boxes, air columns, water columns, or other approved classroom setups to demonstrate resonance.

6. Can tuning fork sets be used to demonstrate beats?

Yes, if the set includes two forks with close frequencies, they can be used to demonstrate beats, where sound intensity rises and falls periodically.

7. How should tuning forks be struck?

Tuning forks should be struck gently with a rubber mallet or approved soft striker. They should not be hit against hard metal, glass, or rough surfaces.

8. Can students use tuning forks independently?

Students should use tuning forks under teacher or laboratory supervisor guidance to ensure correct striking method, safe handling, and proper observation.

9. How should StemAids Tuning Fork Sets be stored?

After use, wipe each fork clean and store the complete set in a clean, dry place or protective case to prevent bending, corrosion, scratches, or impact damage.

10. Are these tuning fork sets suitable for certified acoustic calibration?

No, StemAids Tuning Fork Sets are intended for educational laboratory and classroom demonstrations. For certified acoustic calibration or professional tuning applications, use calibrated reference instruments.

Tuning Forks

StemAids Tuning Forks are educational sound and vibration instruments designed for demonstrating frequency, resonance, pitch, sound waves, vibration, and basic acoustics principles in physics and general science laboratories. They are suitable for school science labs, college physics classrooms, STEM labs, music-science demonstrations, and teacher-led practical sessions.

Tuning forks produce a clear tone when struck gently and are commonly used to help students understand how vibrating objects create sound. They are useful for comparing pitch, studying resonance with sound boxes, demonstrating beat frequency, and introducing wave behaviour in a simple hands-on format.

Product Highlights

  • Educational tuning forks for physics sound and vibration demonstrations
  • Useful for teaching frequency, pitch, resonance, sound waves, and vibration
  • Suitable for school, college, STEM, and general science laboratories
  • Can be used with resonance boxes, rubber mallets, and sound wave experiments
  • Helps students connect sound theory with direct observation and listening
  • Recommended for teacher-supervised classroom practicals

Product Description

The StemAids Tuning Forks are designed to provide a simple and reliable way to demonstrate the production of sound through vibration. When a tuning fork is struck gently, its two prongs vibrate at a fixed frequency and produce a steady musical tone. This helps students understand the relationship between vibration, frequency, pitch, and sound energy.

In classroom experiments, tuning forks can be used to compare high and low frequencies, observe resonance, demonstrate sound transfer through solids, and study beats using two forks of slightly different frequencies. They are also useful for introducing acoustics concepts in physics and interdisciplinary STEM learning.

StemAids provides educational science products that support hands-on learning, practical observation, and concept-based classroom teaching. StemAids Tuning Forks are suitable for physics departments, science laboratories, music-science demonstrations, STEM activity rooms, and institutional procurement.

Product Specifications

Product Name Tuning Forks
Brand StemAids
Product Type Educational sound and vibration demonstration instrument
Application Sound wave experiments, frequency demonstration, resonance study, pitch comparison, beat frequency activities, and classroom acoustics practicals
Concept Covered Sound, vibration, frequency, pitch, resonance, waves, energy transfer, and acoustics basics
Frequency Options Available frequencies may vary as per supplied set or individual fork configuration
Typical Use Accessories Rubber mallet, resonance box, sound box, water container, or laboratory support accessories as per experiment requirement
Recommended Use School physics labs, college science labs, STEM classrooms, general science labs, and training laboratories
Subject Area Physics, sound science, acoustics, general science, music-science learning, and STEM education
Suitable For Students, teachers, lab assistants, physics instructors, STEM educators, and educational institutions
Usage Type Educational laboratory demonstration and classroom practical use
Cleaning Instruction Wipe gently with a soft dry cloth after use and keep free from dust, moisture, and chemical exposure
Storage Instruction Store in a clean, dry place or protective case to prevent bending, corrosion, impact, or frequency damage

How to Use

  1. Hold the StemAids Tuning Fork gently by the stem, not by the vibrating prongs.
  2. Strike one prong lightly with a rubber mallet or suitable soft striker.
  3. Do not strike the fork against hard metal or sharp surfaces, as this may damage the prongs.
  4. Bring the vibrating fork near the ear carefully to hear the tone.
  5. Place the stem on a resonance box or tabletop to demonstrate amplification of sound.
  6. Use different frequency forks to compare pitch and sound differences.
  7. For resonance demonstrations, use the fork with an approved sound box, air column, or water column setup under teacher guidance.
  8. Record observations such as pitch, loudness, vibration time, resonance effect, or beat sound.
  9. After use, wipe the tuning fork clean and store it safely.

Safety and Care Instructions

  • Use under teacher or laboratory supervisor guidance during student practicals.
  • Strike tuning forks only with a rubber mallet or approved soft striker.
  • Do not hit tuning forks on hard surfaces, glassware, metal edges, or laboratory benches.
  • Do not place vibrating prongs too close to the ear or face.
  • Handle carefully to avoid bending the prongs, as this may affect frequency accuracy.
  • Keep away from corrosive chemicals, excessive moisture, and rough handling.
  • Store forks properly after use to prevent scratches, rust, or accidental damage.
  • This product is intended for educational sound demonstrations and classroom learning only.

Applications

  • Sound and vibration demonstrations
  • Frequency and pitch comparison
  • Resonance experiments
  • Beat frequency demonstrations
  • Sound wave and acoustics lessons
  • Energy transfer through vibration
  • Physics practical classes
  • STEM science activities
  • Music and science interdisciplinary learning
  • School and college laboratory procurement

Why Choose StemAids Tuning Forks?

StemAids offers educational science instruments designed to support hands-on learning, classroom demonstrations, and clear concept understanding. StemAids Tuning Forks help students observe sound production directly and connect vibration, frequency, pitch, and resonance through practical activities.

  • Useful teaching aid for sound and wave lessons
  • Supports hands-on physics and acoustics demonstrations
  • Suitable for school, college, STEM, and training laboratory use
  • Helps students understand vibration and resonance practically
  • Convenient product for science labs, educational institutions, and laboratory suppliers

SEO Title

StemAids Tuning Forks for Physics Lab, Sound Wave, Frequency and Resonance Experiments

Meta Description

Buy StemAids Tuning Forks for physics labs, sound wave experiments, frequency comparison, resonance demonstrations, vibration study, acoustics lessons, and STEM learning.

SEO Keywords

StemAids Tuning Forks, Tuning Forks for Physics Lab, Sound Wave Demonstration, Frequency Tuning Fork, Resonance Experiment Tuning Fork, Physics Lab Sound Equipment, Acoustics Teaching Instrument, STEM Sound Experiment Kit, School Science Lab Equipment, Educational Tuning Forks.

Frequently Asked Questions

1. What are StemAids Tuning Forks used for?

StemAids Tuning Forks are used to demonstrate sound production, vibration, frequency, pitch, resonance, and basic acoustics concepts during physics and general science practicals.

2. Are these tuning forks suitable for school physics laboratories?

Yes, they are suitable for school science labs, college physics labs, STEM classrooms, general science practicals, and teacher-supervised demonstrations.

3. How does a tuning fork produce sound?

A tuning fork produces sound when its prongs vibrate after being struck gently. These vibrations disturb the surrounding air and create sound waves.

4. Can tuning forks be used to demonstrate resonance?

Yes, tuning forks can be used with resonance boxes, air columns, water columns, or other approved classroom setups to demonstrate resonance.

5. What is the difference between tuning forks of different frequencies?

Tuning forks with higher frequencies produce higher-pitched sounds, while tuning forks with lower frequencies produce lower-pitched sounds.

6. Can students use tuning forks independently?

Students should use tuning forks under teacher or laboratory supervisor guidance to ensure correct striking method, safe handling, and proper observation.

7. How should tuning forks be struck?

Tuning forks should be struck gently with a rubber mallet or approved soft striker. They should not be hit against hard metal, glass, or rough surfaces.

8. How should StemAids Tuning Forks be stored?

After use, wipe the forks clean and store them in a clean, dry place or protective case to prevent bending, corrosion, scratches, or impact damage.

9. Are these tuning forks suitable for certified acoustic calibration?

No, StemAids Tuning Forks are intended for educational laboratory and classroom demonstrations. For certified acoustic calibration or professional tuning applications, use calibrated reference instruments.

Ensemble Interactives Exploring Entropy

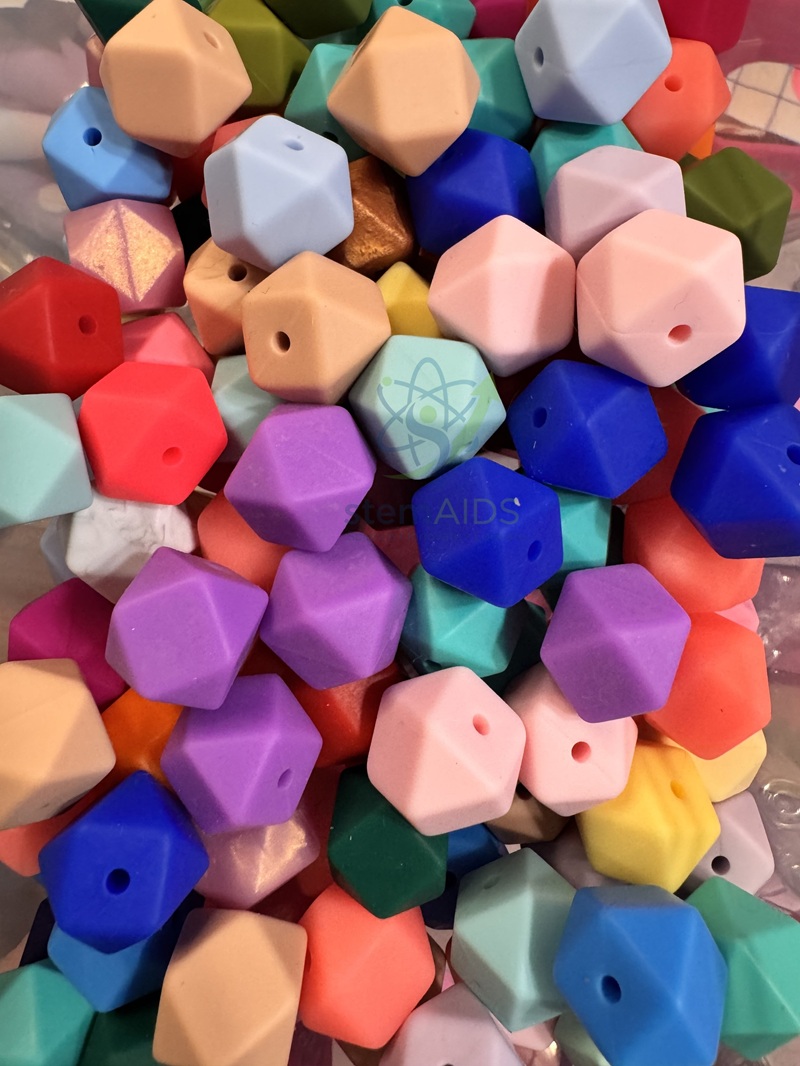
Quick Answer: Ensemble Interactives Exploring Entropy is an interactive classroom set for teaching entropy through hands-on models of how particles and energy spread out. The listing photo shows a large number of loose, coloured faceted beads; the full contents are not listed.

Entropy as Counting Arrangements

Entropy is often described as disorder, a word that misleads students. A more useful picture, and the one hands-on activities build, is counting: entropy measures how many different arrangements of particles and energy are consistent with what we observe. A state that can be reached in many ways is overwhelmingly more likely than one that can be reached in only a few.

Coloured counters make the idea concrete. Start with beads of two colours separated in a tray, shake it, and they mix; shake again and they practically never unmix, because mixed arrangements vastly outnumber separated ones. Counting the ways a few units of energy can be shared among a small number of particles, and then a larger number, shows how quickly the count grows with size, which is the root of the second law of thermodynamics.

The listing photo shows only loose beads in many colours, so the full contents, instructions and any worksheets included with the set should be confirmed before lessons are planned around it. The activities above can be run with beads and a tray alone.

Specifications

Item Interactive classroom set on entropy
Listed as Ensemble Interactives Exploring Entropy
Shown in photo Loose coloured faceted beads (photo)
Topic Entropy, probability and the spreading of particles and energy
Full contents and teacher notes Confirm at enquiry

Applications

  • Modelling the mixing of two gases with two colours of beads in a shaken tray
  • Counting the arrangements of energy units among particles to introduce microstates
  • Linking probability to the direction of spontaneous change in pre-university chemistry and physics
  • Discussing why dissolving and diffusion happen without being driven

Care & Handling

  • Count the beads of the Exploring Entropy set back into their container after each lesson, since losses change the numbers in counting activities.
  • Keep small beads away from young children, as they are a choking hazard.
  • Wash beads in warm soapy water if they get dirty, and dry them fully before storing.

Why Choose LabEquip

Chemistry and physics teachers at pre-university level, who need to teach entropy beyond the word disorder, are the likely buyers of this set. LabEquip lists it with its chemistry lab equipment; request the contents list through the contact page before ordering.

Frequently Asked Questions

What is entropy in simple terms?

Entropy measures how many ways the particles and energy of a system can be arranged while it looks the same overall. States that can be arranged in more ways have higher entropy and are more likely to occur.

Why is disorder a misleading description of entropy?

Some changes that look more ordered, such as crystals forming in a cooling solution, still increase the total entropy once the heat released to the surroundings is counted. Thinking in terms of the number of arrangements avoids that confusion.

How do beads model entropy?

Two colours of beads start separated and are shaken together. They quickly mix and almost never return to separate groups, because mixed arrangements vastly outnumber separated ones.

Which age group is the set suited to?

The ideas suit upper-secondary and pre-university chemistry or physics, where entropy and the second law are introduced. The bead activities can be used more simply with younger classes to discuss mixing and diffusion.

What is included in the set?

The listing photo shows loose coloured faceted beads, but the full contents are not listed. Ask for the contents and any teacher notes when you enquire.

How does entropy relate to the second law of thermodynamics?

The second law states that the total entropy of an isolated system does not decrease. Systems move towards the arrangements that can happen in the most ways, which is why heat flows from hot to cold.

Last Updated: September 2026
Economy Calorimeter

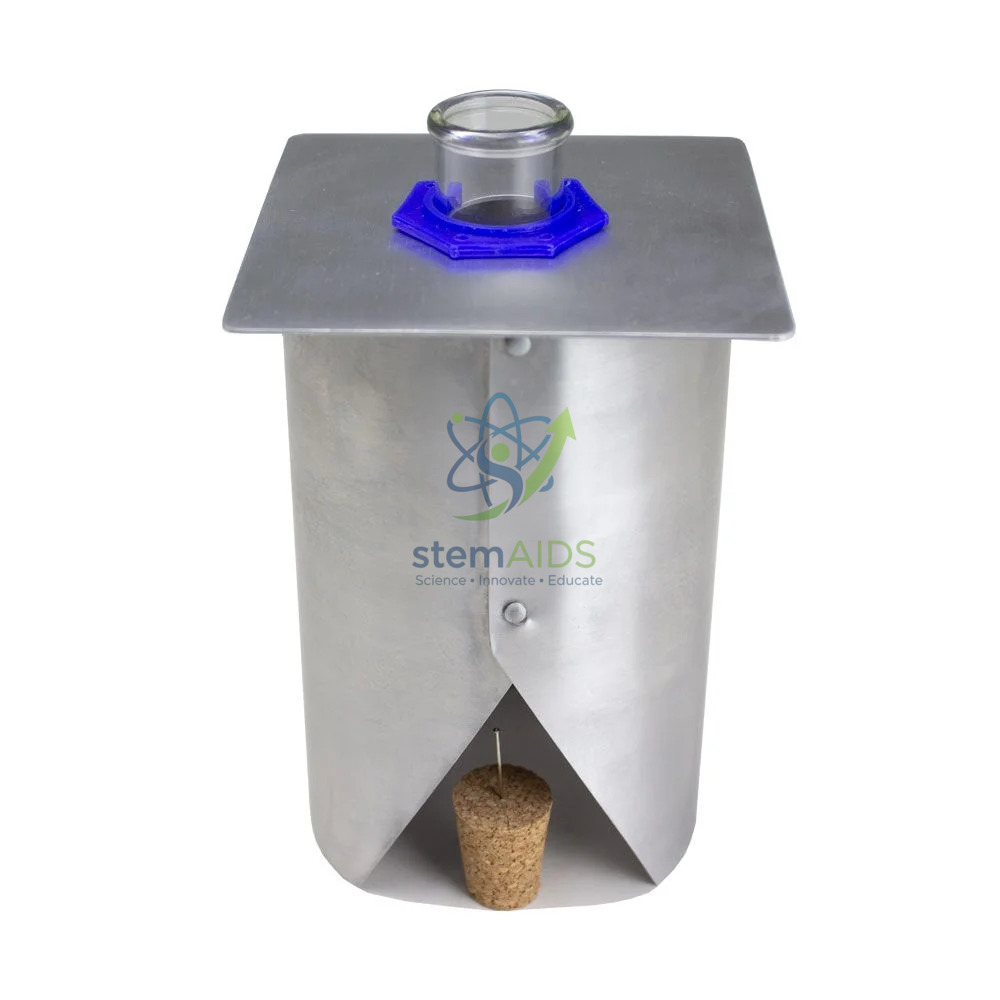
Quick Answer: The Economy Calorimeter is a simple food calorimeter for estimating the energy stored in food. The listing photo shows a metal chimney with a flat top plate, a glass tube held in a blue collar on top, and a cork with a pin at the base, where a food sample is burned so that its heat warms water in the tube.

Burning Food to Heat Water

Food energy practicals follow a simple sequence. Weigh a small, dry piece of food, fix it on the pin in the cork, set it alight and let its flame heat a measured mass of water in the tube above. From the temperature rise, the mass of water and the specific heat capacity of water, students calculate the energy transferred, then divide by the mass of food that burned.

The economy calorimeter improves on holding a boiling tube over a burning snack in open air. The metal chimney surrounds the flame and guides the hot gases up to the water tube, while the triangular opening at the base lets air in and gives access for lighting the sample. In the photo the water container is a glass tube seated in a blue holder in the top plate, and the sample holder is a pin fixed in a cork below.

Results always come out lower than the values printed on food packets, because heat escapes through the chimney walls and with the exhaust gases, some food may not burn completely, and the glass itself absorbs heat. Discussing those losses, and how laboratory bomb calorimeters reduce them, is often the most valuable part of the practical.

Applications

  • Comparing the energy content of snacks such as crisps, crackers and puffed cereals
  • Calculating energy per gram of food from temperature rise and loss in mass
  • Evaluating experimental error and heat loss in a combustion practical
  • Comparing the energy released by small samples of fuels such as candle wax

Specifications

Item Simple food (combustion) calorimeter
Chimney Metal body with flat top plate and an opening at the base (photo)
Water container Glass tube held in a blue collar on top (photo)
Sample holder Cork with a mounting pin (photo)
Thermometer Not shown; use a laboratory thermometer or temperature probe
Dimensions and tube volume Confirm at enquiry

Care & Handling

  • Check the class for food allergies before choosing samples for the food calorimeter, and leave out nuts if anyone is allergic.
  • Burn only small, dry samples, with a heat-resistant mat under the calorimeter.
  • Let the chimney cool fully before handling, as the metal stays hot after the flame goes out.
  • Clean soot from the glass tube between runs so that each trial starts from the same condition.

Why Choose LabEquip

Biology and chemistry teachers covering food energy, respiration and energy transfer buy economy calorimeters so that each group can run its own trials. LabEquip lists it among its chemistry lab equipment; class-set numbers can be discussed on the contact page.

Frequently Asked Questions

How is energy content calculated with this calorimeter?

Multiply the mass of water by its specific heat capacity, 4.18 joules per gram per degree Celsius, and by the temperature rise. Divide that energy by the mass of food burned to get joules per gram.

Why are results lower than the values on food packets?

Heat escapes to the air and into the chimney, some food does not burn completely, and the glass absorbs heat. Packet values come from methods that capture far more of the energy.

Which foods work well?

Dry, oily foods that burn steadily, such as crisps, crackers or puffed cereal. Moist foods are hard to light and tend to go out before they have burned completely.

How much water should go in the tube?

Use a measured mass of water that leaves space above it, weighed on a balance rather than estimated. Keep the same mass for every trial so that results can be compared fairly.

Why does the design include a chimney?

The chimney channels hot gases up to the water container and shields the flame from draughts. That cuts heat loss compared with holding a tube over a flame in open air, giving more consistent results.

Can nuts be used as samples?

Nuts burn well and are traditional in this practical, but they must be avoided if anyone in the room has a nut allergy. Crisps or cereals work as substitutes.

Last Updated: September 2026

Conductivity Tester

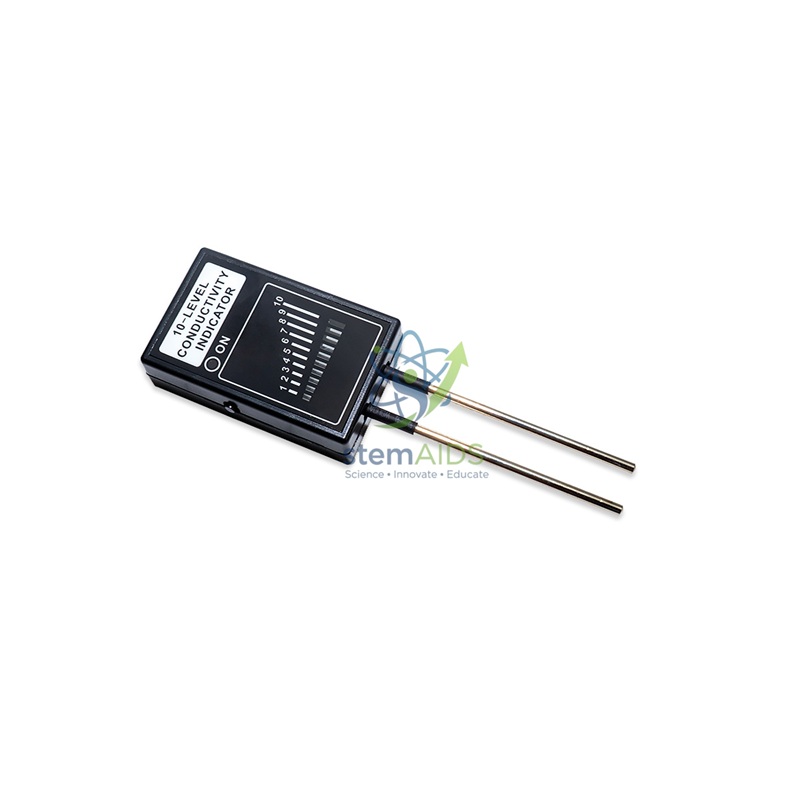
Quick Answer: The conductivity tester is a handheld probe that shows how well a solution or wet sample conducts electricity. The listing photo shows a black unit labelled ’10-Level Conductivity Indicator’, with an ON lamp, a ten-step bar display and two metal prongs that are dipped into the sample.

From Lit Bars to Ions in Solution

This handheld tester answers a simple question quickly: does this liquid carry a current, and roughly how well? With both prongs in a sample, the tester applies a small voltage between them and the display lights more bars as more current flows. Distilled water should light very few bars, while a strong salt solution lights many more.

The reason is ions. Ionic compounds such as sodium chloride dissolve into charged particles that move between the prongs, while sugar and ethanol dissolve as neutral molecules and conduct hardly at all. Comparing equal concentrations of hydrochloric and ethanoic acids shows the difference between strong and weak electrolytes, because the weak acid is only partly ionised.

The ten levels are a comparison scale, not a calibrated reading. For values in microsiemens per centimetre, a laboratory conductivity meter is required, or the wireless conductivity sensor, which logs readings to a device. The tester’s strength is speed: one dip gives a visible answer that the whole group can see at once.

Specifications

Item Handheld conductivity tester
Display Ten-level bar indicator with ON lamp (photo)
Probe Two parallel metal prongs (photo)
Output Relative conductivity level, not a calibrated value
Power source Confirm at enquiry

Applications

  • Sorting solutions into strong, weak and non-electrolytes
  • Showing that solid salt does not conduct while its solution does
  • Comparing tap, distilled, rain and mineral water samples
  • Tracking how conductivity rises as more salt is dissolved in water

Care & Handling

  • Rinse the tester’s prongs with distilled water and dry them between samples to avoid carrying ions across.
  • Dip only the prongs, never the body of the tester, into liquids.
  • Switch the tester off at the end of each session.
  • Wipe deposits off the prongs with a soft cloth rather than scraping them with metal tools.

Why Choose LabEquip

Lower-secondary science teachers and chemistry departments teaching electrolytes buy conductivity testers because students get a visible answer in seconds. LabEquip lists this tester in its chemistry lab equipment; ask about sets for group work on the contact page.

Frequently Asked Questions

What does the 10-level display show?

It shows relative conductivity: more bars light as the sample conducts better. The levels let samples be ranked and compared, but they are not calibrated units.

Why does distilled water barely register?

Distilled water contains very few ions, so almost no current flows between the prongs. Dissolving an ionic substance such as salt adds ions and the reading rises.

Why does sugar solution not conduct?

Sugar dissolves as whole, uncharged molecules. With no ions to carry charge between the prongs, the current stays close to zero, just as in pure water.

How is a conductivity tester different from a laboratory conductivity meter?

A tester gives a quick relative indication for classifying samples. A laboratory conductivity meter uses a calibrated cell and temperature compensation to report conductivity in microsiemens or millisiemens per centimetre.

Can it test solids?

Only in some cases. Dry salt crystals do not conduct because their ions cannot move, although the same salt conducts once dissolved. A piece of metal touching both prongs does conduct, because metals carry current through free electrons.

How should the prongs be cleaned?

Rinse them with distilled water after every sample and wipe them dry. Residue from the previous solution adds ions to the next sample and gives a falsely high reading.

Last Updated: September 2026
Aspirator

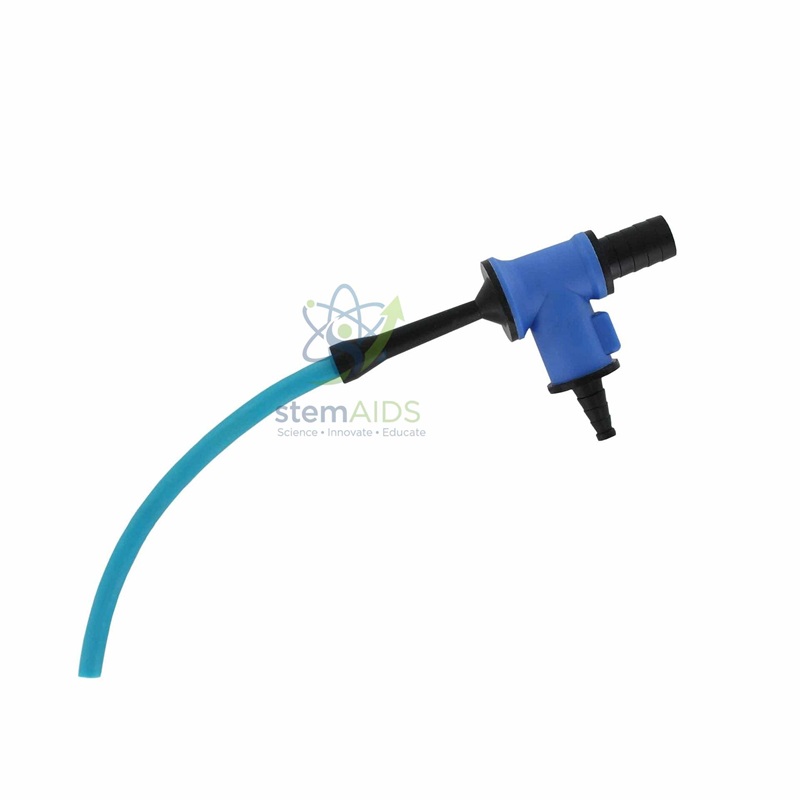
Quick Answer: This plastic water aspirator, listed simply as ‘Aspirator’, is a small water-jet vacuum pump that fits a laboratory tap. The listing photo shows a blue plastic body with a ribbed inlet for the tap connection, a stepped side barb for vacuum tubing and an outlet tail leading to the drain, used to provide suction for filtration.

Suction from Running Water

When tap water is forced through the narrow jet inside the aspirator, it speeds up and its pressure falls. Air from the side connection is dragged into the stream and carried away down the drain. Connect that side barb to a filter flask with thick-walled tubing, and the flask is evacuated for as long as the tap runs.

This version is moulded in plastic rather than made of glass or metal. In the photo the blue body carries a ribbed black inlet at the top for tubing from the tap, a stepped barb on the side that accepts vacuum hose of different bores, and a tapered outlet with tubing attached to lead the water into the sink. A plastic body will not corrode and survives knocks that would break a glass aspirator. The filter pump listed separately works on the same principle.

Suction is strongest with cold water and a fully open tap. Aspirators are noisy and use a lot of water, so they suit routine filtrations rather than hours of continuous vacuum. For rooms without a tap, the filtering kit supplies a hand pump instead.

Applications

  • Buchner filtration of crystals and precipitates in chemistry practicals
  • Pulling air through a filter cake so that crystals are partly dried before they are weighed
  • Speeding up the filtration of fine suspensions that clog gravity filter papers
  • Evacuating a vacuum desiccator slowly

Specifications

Item Water-jet aspirator (filter pump)
Material Plastic body (photo)
Connections Ribbed tap inlet, stepped side barb for vacuum tubing, outlet tail (photo)
Power Water flow from a tap; no motor or electricity
Tap thread or adapter Confirm at enquiry

Care & Handling

  • Fit a trap bottle between the plastic water aspirator and the filter flask so water cannot run back into the flask if the tap pressure drops.
  • Pull the vacuum tubing off before turning the tap off, for the same reason.
  • Secure the tap connection with a hose clip if the tubing tends to slip under full flow.
  • Rinse the aspirator through with clean water after filtering corrosive solutions.

Why Choose LabEquip

School and college labs with bench sinks use water aspirators for everyday suction filtration because they need no electricity. This one is listed with LabEquip’s chemistry lab equipment; ask about tap fittings on the contact page.

Frequently Asked Questions

How does a water aspirator create a vacuum?

Tap water is pushed through a constricted nozzle, where it accelerates and its pressure falls. Air from the side connection is entrained by the fast-moving stream and swept out, so the pressure in the attached flask drops.

Why does water sometimes flow back into the filter flask?

If the tap pressure falls, or someone closes the tap while the flask remains evacuated, the low pressure in the flask pulls water back through the side barb. A trap bottle, and disconnecting before turning off, prevent it.

How can the suction be improved?

Open the tap fully, use cold water, and check that all tubing is thick-walled and firmly connected. Leaks at the funnel adapter or at the tubing ends are the commonest cause of weak suction.

Is a plastic aspirator better than a glass one?

Plastic resists knocks and does not shatter, which suits student benches. Glass resists a wider range of solvents. Both work in the same way, so the choice depends on how the aspirator will be used and handled.

Can the aspirator be used for vacuum distillation?

A water aspirator gives only a moderate vacuum. That is enough for filtration and some reduced-pressure distillations of high-boiling liquids, but deeper vacuum needs a mechanical pump.

Does it need electricity?

No. It runs entirely on water flow from the tap, so it can be used at any bench sink, although it uses a considerable amount of water while running.

Last Updated: September 2026

Overflow Can, Clear Acrylic

Quick Answer: The clear acrylic overflow can is a transparent displacement vessel with a short side spout near the rim and a printed volume scale. Because the wall is clear, students can watch the water level and the immersed object while the displaced water runs from the spout into a measuring cylinder or beaker.

Seeing Displacement Happen

An overflow can works on a simple rule: once it is full to the spout, any object lowered in pushes out its own volume of water. In a metal can that happens out of sight. The acrylic version, shown in the listing photo as a transparent cylinder with a tube-like spout near the top and graduations on its side, lets the class see the object go under, the level reach the spout and the water begin to run.

That visibility helps when teaching the method itself. Students can see why the can must be filled until it overflows and then left to stop dripping, why an object must be fully submerged to displace its whole volume, and how a floating object settles only until it has displaced its own weight of water. The printed scale gives a quick visual check of the level, but the displaced volume is measured in a measuring cylinder.

Acrylic is lighter than metal and will not dent, although it scratches more easily and must not be used with hot water or solvents. For weighing displaced water directly with a spring balance, the metal overflow can and bucket set is the better choice; the density cube set supplies regular solids to test.

Specifications

Item Transparent overflow (displacement) can
Material Clear acrylic, as stated in the title
Spout Short side spout near the rim (photo)
Scale Printed volume graduations on the wall (photo)
Capacity Confirm at enquiry

Care & Handling

  • Fill the clear acrylic overflow can with cold or lukewarm water only, as hot water can distort acrylic.
  • Clean with water, mild detergent and a soft cloth; solvents and abrasive pads craze or scratch the plastic.
  • Lower heavy or sharp objects on a thread so they do not crack the base.
  • Dry the can and store it upright where it will not be knocked over.

Applications

  • Measuring the volume of stones, keys and other irregular solids by displacement
  • Showing why a floating object displaces less water than a sunken object of the same size
  • Density practicals pairing displacement volume with mass from a balance
  • Demonstrations shown on a visualiser, where the whole class must see the water level

Why Choose LabEquip

Primary and lower-secondary teachers introducing displacement and floating choose the clear overflow can because students can see every stage. LabEquip lists it with its chemistry lab equipment; class quantities can be requested on the contact page.

Frequently Asked Questions

Why choose a clear overflow can instead of a metal one?

The clear wall lets students watch the object and the water level during displacement, which helps them understand the method. A metal can is more robust and suits heavier objects and more frequent use.

How do I get an accurate displacement reading?

Fill the can until water runs from the spout, wait for the dripping to stop, place the collecting cylinder, then lower the object slowly on a thread. Read the collected volume at eye level at the bottom of the meniscus.

Can the printed scale replace a measuring cylinder?

It gives a rough visual guide to the water level. For the displaced volume itself, collect the water from the spout in a measuring cylinder, which is graduated for that purpose.

Can hot water be used in the can?

No. Acrylic softens at relatively low temperatures, and hot water can distort or crack it. Use water at room temperature.

Why does a floating object displace less water?

A floating object sinks only until the water it displaces weighs as much as the object. A denser object of the same size sinks completely and displaces its full volume.

How should the acrylic be cleaned?

Rinse with water, wash with a mild detergent and a soft cloth, and let it air dry. Avoid alcohol, acetone and scouring pads, which cloud or crack the plastic.

Last Updated: September 2026

Atoms, Electrons and Energy Kit

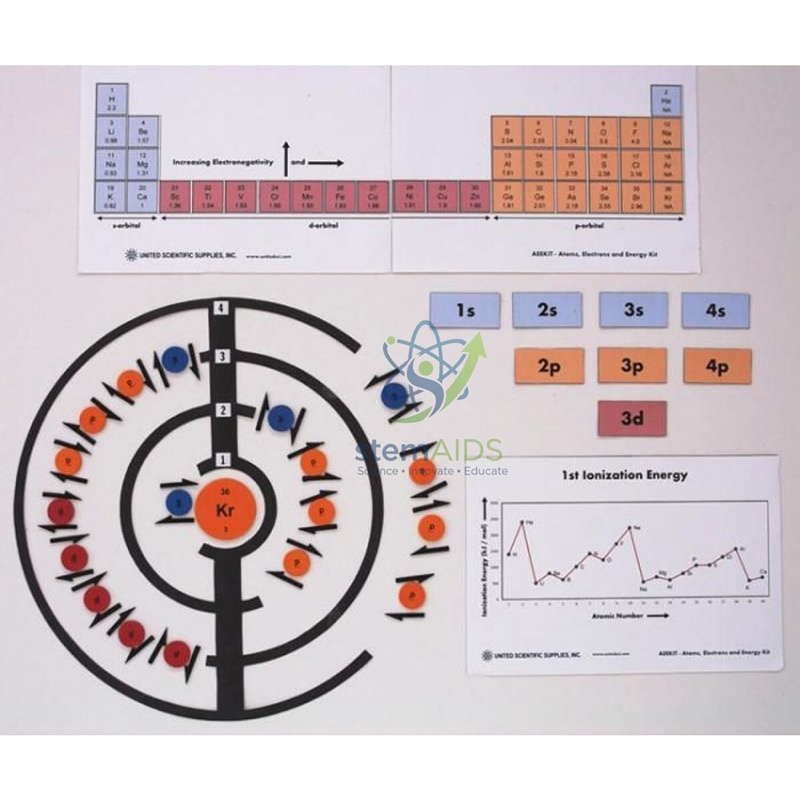
Quick Answer: The Atoms, Electrons and Energy Kit is a classroom set for building electron arrangements and linking them to ionisation energy. The listing photo shows a four-shell atom diagram with colour-coded electron pieces and arrows, sublevel tiles from 1s to 4p, a periodic table card and a graph of first ionisation energy against atomic number.

Building Electron Configurations Piece by Piece

Electron configurations are hard to learn from notation alone, and this kit makes them physical. In the photo a large diagram of four concentric shells surrounds a nucleus disc, and coloured discs marked s and p are placed on the shells one electron at a time, with arrow pieces beside them. The example laid out is krypton, atomic number 36, with all four shells in use.

Separate tiles labelled 1s, 2s, 3s, 4s, 2p, 3p, 4p and 3d let students arrange sublevels in filling order and see why 4s fills before 3d. A periodic table card covering the first 36 elements is coloured by s, p and d blocks and carries electronegativity values, and a printed graph of first ionisation energy against atomic number shows the familiar peaks at the noble gases and drops at the alkali metals.

Used together, the parts connect structure to evidence. Students build the configuration of an element, find it on the periodic table card, then explain its position on the ionisation energy graph: for example, why the value falls sharply from neon to sodium, where a new shell begins.

Specifications

Item Classroom kit for modelling electron arrangements
Atom model Four-shell diagram with nucleus disc and colour-coded electron pieces (photo)
Sublevel tiles 1s, 2s, 3s, 4s, 2p, 3p, 4p, 3d (photo)
Reference cards Periodic table of the first 36 elements with electronegativity values; first ionisation energy graph (photo)
Magnetic or table-top use Confirm at enquiry

Applications

  • Building electron configurations for elements 1 to 36 and writing the matching notation
  • Explaining the order of sublevel filling, including 4s before 3d
  • Relating trends in first ionisation energy to shells and sublevels
  • Whole-class modelling in which students take turns to add electrons

Care & Handling

  • Count the electron pieces and tiles of the Atoms, Electrons and Energy Kit back into their bags after each lesson; missing pieces stop the heavier elements being built.
  • Keep the printed cards flat and dry, and wipe them with a barely damp cloth only.
  • Store the shell diagram flat rather than rolled, so that pieces lie evenly on it.

Why Choose LabEquip

Chemistry teachers covering atomic structure at upper-secondary and pre-university level buy this kit to move students on from drawing shells to understanding sublevels. It is listed with LabEquip’s chemistry lab equipment; ask about sets for group work on the contact page.

Frequently Asked Questions

What does the Atoms, Electrons and Energy Kit teach?

It teaches how electrons are arranged in shells and sublevels, the order in which sublevels fill, and how those arrangements explain the pattern of first ionisation energies across the periodic table.

Which elements can be modelled with the kit?

The shell diagram has four shells and the periodic table card runs to krypton, atomic number 36, so elements from hydrogen to krypton can be built.

Why does 4s fill before 3d?

For potassium and calcium the 4s sublevel is lower in energy than 3d, so it fills first. The sublevel tiles let students set out 1s, 2s, 2p, 3s, 3p, 4s, 3d and 4p in that filling order.

Why does ionisation energy drop from neon to sodium?

Sodium’s outer electron is in a new shell, further from the nucleus and shielded by the inner electrons, so it is removed far more easily than an electron from neon’s full second shell.

What do the arrow pieces show?

They represent electron spin. Two electrons sharing an orbital have opposite spins, which is why the arrows are drawn in pairs pointing up and down.

Is the kit suitable for younger students?

Younger classes can use the four shells alone to build simple shell diagrams for the first 20 elements. The sublevel tiles and ionisation energy graph suit students in the final years of school and above.

Last Updated: September 2026

Select your currency
USD United States (US) dollar
×

No WhatsApp Number Found!

WhatsApp us
Exit mobile version